What you'll learn
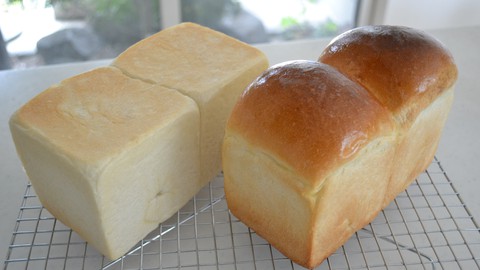
- 🍞 Master the art of baking the famous Japanese SHOKUPAN right in your own kitchen!
- 🥖 Gain fundamental bread-baking skills that go beyond Japanese milk bread.
- 🇯🇵 Discover what makes Japanese SHOKUPAN so uniquely delicious.
- 👩🍳 Learn the secrets to baking a flawless loaf of SHOKUPAN every single time.
- ⚖️ Understand the importance of precise ingredient measurement for perfect bakes.
- 🧑🍳 Get acquainted with essential ingredients to create perfect bread.
- 📏 Ensure perfect bread every time with tips on calculating dough quantities for your pan.
- 🌾 Differentiate between various types of flour, their textures, and uses.
- 🧫 Explore the varieties of yeast and understand their unique properties.
- ⚗️ Uncover the magic of the fermentation process in bread making.
- 📊 Master the concept of "Baker's Percentage" for better control of recipes.
- 🥄 Decide between no-knead and well-knead methods for optimal results.
- 🔄 Compare the Straight-Dough and Sponge-Dough methods for different textures.
- 🔥 Know the differences between gas ovens and electric ovens for better baking.
- ❄️ Learn what the Cold-Start Baking Method is and how it benefits your bakes.
- 🍽️ Delight in the experience of enjoying a slice of freshly baked SHOKUPAN.
- 📚 Dive into the fascinating history behind Japan's bread culture.
- 💪 Transform hand kneading into a full-body workout session!
- 🎉 And much more to enhance your baking journey!
Course Content
Introduction
2 lecturesQuick overview of this course.
In this course, you will learn how to bake perfect SHOKUPAN.
If you are just starting in bread baking, you will learn the very basic techniques not only for SHOKUPAN baking.
First, you will learn the basics of bread baking with detailed instructions and a free pdf downloadable E-book (37 pages.)
Next, you'll move onto the video lectures for Beginner's SHOKUPAN by hand-kneading. (of course, you can knead by stand-mixer or bread baker.)
It will be an easy one; it's at 66% hydration, which means not that sticky and pretty easy to handle.
Once you've taken a basic SHOKUPAN making process, you will be ready to move on to higher hydration SHOKUPAN.
After mastering the Beginner's SHOKUPAN, we will move onto the Regular SHOKUPAN at 72% hydration.
You'll be surprised how tasty it is, and your kitchen will be full of wonderful baking smells.
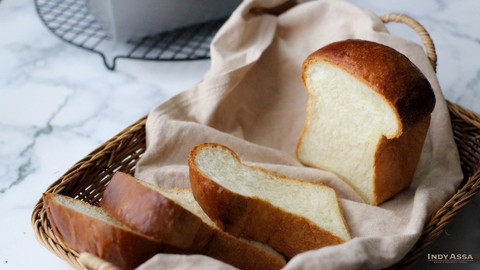
Slice SHOKUPAN into a thick slice, and when you toast it, the outside is so crunchy, and yet inside is still fluffy and moist.
Top with butter while still hot, and the butter melts into the crumb...it tastes just like heaven!
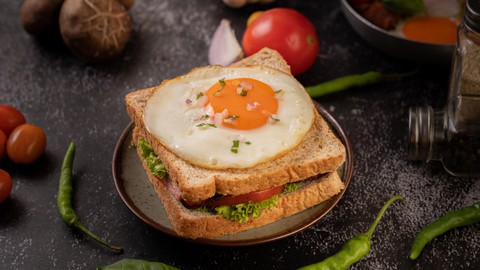
When you slice it into thin slices and make a Japanese-style triangle sandwich, you will be surprised at how delicious it is.
A lot of my followers tagged me on social media, and they say, "This is the best loaf ever!"
Let's make it happen in your kitchen by enrolling in "SHOKUPAN Bread Baking 101."
Let's get dive into it!
Quick overview
1 lectureLet's see the overview of this course.
We are collecting and gathering all the ingredients on the countertop not to miss out on anything.
Knead the dough, and we will do the First Rise, punch it down, and let it rise for the Second Rise.
Give it a poke test to see the fermentation has properly done, then divide as instructed.
Take a Bench rest, then shape it, and let it rise for the final step, and bake it in the oven.
It seems quite a long way, but it's not difficult than you think.
Bread Baking Basics
1 lectureIn this lecture, you can access the E-book "Everything you need to know about SHOKUPAN," with 37 pages of downloadable PDF files.
It is a valuable resource about Baking Basics not only for SHOKUPAN.
You can click on the heading on page 3 jump to what you want to know.
You can always come back later to read through the articles.
The Beginner's SHOKUPAN by hand-kneading
5 lecturesPreparation
・Collect and gather all the ingredients on the countertop not to miss out on anything.
・Check the temperature of your room, flour, and the liquid.
・Determine the water temperature, using a formula as an attached PDF file.
・Your unsalted butter should be at room temperature. It should not be melted or not too firm. It's perfect if soft to touch.
Hand-Kneading
〈Mix the ingredients〉
・Put your flour into the medium-size bowl and add salt and sugar.
・Add in instant dry yeast.
※I am adding yeast after the sugar and salt because the salt might affect the yeast activity. The salt might kill or slower the yeast activities.
・Pour in milk and water mixture in three stages.
〈10-minutes Resting〉
・Mix until the dough form, cover with a plastic wrap, and leave it for 10 minutes until the bread flour soaks up the moisture and relaxes the gluten.
〈Spread and gathering〉
・Take the dough onto the working surface, spread it by your hand, and put it back together. Repeat 10 times.
〈Hand-kneading〉
・Fold the dough over itself and use the heels of your palm and push it away from you.
・Rotate and repeat the process until that dough looks very elastic and stretchy and very smooth.
・Pushing the dough and rotate the dough with your left hand and right hand alternatively.
※I do my hand-kneading as a full-body exercise.(See attached PDF file)
・After 5 minutes of kneading, let's check the gluten structure has developed or not.
〈The Windowpane Test 1〉
・Take a small piece of the dough, about the size of the ping pong ball. Hold it between your thumb and first two fingers and stretch it.
・If the dough stretches like paper-thin, and it looks like a translucent membrane, it's good to go.
※If the dough breaks, knead another a couple of minutes to give it strength. And give it the windowpane test again.
〈Add in unsalted butter〉
・If your dough passed the windowpane test; it's time to add unsalted butter.
・Knead until the butter is fully incorporated and makes it elastic and shiny, and smooth.
※When you add unsalted butter, the dough will separate, and it looks like you are doing wrong, but no worries, it will come together in a couple of minutes.
〈The Windowpane Test 2〉
・Ckeck the dough by giving it a windowpane test again.
If you can stretch the dough without breaking, that means the gluten is well-developed, and your dough is ready to rise. Transfer the dough into a greased bowl.
〈Shape into a ball〉
・To make it into a ball, give it a tension on the surface and make a skin on it.
※The skin holds the carbon dioxide gases that create in the fermentation process.
・Put it in a greased bowl and cover it with a piece of plastic.
〈The First Rise〉
・Take the dough temperature: Somewhere between 22 to 24 ℃(72~75℉.)
※If the dough temperature is higher than this, put it in the fridge for 10 minutes to chill a little bit.
※If the dough temperature is under 22℃ (72℉), put it in a little bit higher temperature warm place like 32 to 33°C (90~92℉.)
※I want to keep my dough temperature a little bit lower than the common recipe to develop more aroma to it.
※This is not a mandatory step. You can leave it to rise and let it take time as needed until it doubles in volume.
・Let the dough at a warm place, about 30°C(86℉, until it rises double in volume.
It's going to take 45 to 60 minutes.
※No higher than that because the First Rise is a very important stage.
※If you kick-start your first rise at a higher temperature like 35℃(95℉) the yeast will not work nicely throughout the process.
※The yeast is really activated at the higher temperature, like 35℃ at first, and it rises quickly, but it would soon be worn out.
※The key to making good bread is how we control yeast activity.
※Proofing Box
I always put the dough in a turned-off microwave oven with a mug filled with boiling water. It creates a perfect environment for the dough in terms of temperature and humidity. →See downloadable PDF file "proofing box."
〈Punch〉
・When the dough has risen almost double in volume, now let's give it a punch.
・Press the dough gently and deflate. Fold it over itself and then shape it into a ball again and put it back to the bowl.
※Punch (actually, just press down gently) helps provide oxygen to the bread dough to activate the yeast work even more.
※Punch isn't a necessary step in any bread baking procedure, but for large-volume bread-like Shokupan. It would make a tall bread.
※Punch gives strength to bread dough through a very simple action.
※This act of punching and folding helps develop the gluten network in the dough. And it keeps carbon dioxide gas well and makes a tall bread.
※When you see the dough rises double in volume, it's time to punch. Yes, you can eyeball to determine the timing.
※If you want to know more precisely, mark the line in the bowl, and you will see how the dough progresses. You don't have to be too strict about it at this stage.
※Punch also helps regulate dough temperature. Because the dough temperature outside tends to get higher than the inside. And allow us an opportunity to assess how the dough is progressing at the same time.
〈The Second rise 〉
・Let the dough rise at a warm place(no higher than 30℃/86℉)for 30 to 35 mins until almost double in volume.
※The dough is really activated at this stage, and it won't need longer fermentation time.
※What you should be aware of is to prevent it from over-fermenting. If bread is allowed to rise to more than double its size, the gluten will stretch to the point of collapse. It will no longer be able to hold the carbon dioxide that will make a spring in the oven. You can still bake the over-fermented dough, but it's not going to spring in the oven and usually very dense.
〈Poke test〉
・Poke test will tell you that your dough is sufficiently fermented
※Poke the dough with your flour-dusted forefinger; if the dough springs back slowly and the hole stays, it's ready to go.
※If the dough springs back quickly and the hole can't stay, it's under fermented. Let it rise for a few more minutes.
※If the dough collapses, it's over fermented. You can go on to the next step, but it would not make a tall bread. Better make it into another shape, or make Pizza!
〈Divide〉
・Once your dough passes the poke test, take it out onto your dusted working surface.
・Weigh the dough and divide into two using a scraper.
※Do not tear the dough. Otherwise, the gluten structure is destroyed.
〈Bench-Rest〉
・Shape the divided dough into a ball, stretch the surface and make a skin on. This is a preshaping for the final shape. Cover and let it rest for 15 to 20 mins.
※While resting, the gluten relaxes, and you can easily shape it into the final shape.
※Cover with a piece of plastic wrap or damp towel.
〈Grease the mold〉
While Bench Resting, grease the inside of the mold.
※I am using vegetable oil spray, but you can do it by your hand. Drop a teaspoon of vegetable oil, and spread it all over the mold.
※I recommend using vegetable oil over butter because there is less chance to stick to the side. Butter contains milk solids, and it might burn and sticks the dough.
〈Shaping〉
・When shaping Shokupan, what we keep in mind is, form a tight outer "skin" and results in a higher rise and better form.
1) Place the dough smooth side down. Roll the dough out gently to remove the gas. Do not go too far so that your dough will have more uniform tiny gas holes.
2) Fold from top and bottom, and make a rectangle shape.
3) Roll it up while tacking the dough. Pinch to seal the end.
4) Place in the greased mold. Be careful with the direction.
5)Cover the mold and go on to the final rise.
〈The Final Rise〉
・ Let the dough rise at a warm place; it should not higher than 30℃/86℉)for for 40 to 50 mins until the dough rises 1cm under the edge. (over the edge when you make a mountain shape.)
Go on to the next video
.I always put the dough in a turned-off microwave oven with a mug filled with boiling water. It creates a perfect environment for the dough in terms of temperature and humidity. →See downloadable PDF file "proofing box."
〈Punch〉
・When the dough has risen almost double in volume, now let's give it a punch.
・Press the dough gently and deflate. Fold it over itself and then shape it into a ball again and put it back to the bowl.
※Punch (actually, just press down gently) helps provide oxygen to the bread dough to activate the yeast work even more.
※Punch isn't a necessary step in any bread baking procedure, but for large-volume bread-like Shokupan. It would make a tall bread.
※Punch gives strength to bread dough through a very simple action.
※This act of punching and folding helps develop the gluten network in the dough. And it keeps carbon dioxide gas well and makes a tall bread.
※When you see the dough rises double in volume, it's time to punch. Yes, you can eyeball to determine the timing.
※If you want to know more precisely, mark the line in the bowl, and you will see how the dough progresses. You don't have to be too strict about it at this stage.
※Punch also helps regulate dough temperature. Because the dough temperature outside tends to get higher than the inside. And allow us an opportunity to assess how the dough is progressing at the same time.
〈The Second rise 〉
・Let the dough rise at a warm place(no higher than 30℃/86℉)for 30 to 35 mins until almost double in volume.
※The dough is really activated at this stage, and it won't need longer fermentation time.
※What you should be aware of is to prevent it from over-fermenting. If bread is allowed to rise to more than double its size, the gluten will stretch to the point of collapse. It will no longer be able to hold the carbon dioxide that will make a spring in the oven. You can still bake the over-fermented dough, but it's not going to spring in the oven and usually very dense.
〈Poke test〉
・Poke test will tell you that your dough is sufficiently fermented
※Poke the dough with your flour-dusted forefinger; if the dough springs back slowly and the hole stays, it's ready to go.
※If the dough springs back quickly and the hole can't stay, it's under fermented. Let it rise for a few more minutes.
※If the dough collapses, it's over fermented. You can go on to the next step, but it would not make a tall bread. Better make it into another shape, or make Pizza!
〈Divide〉
・Once your dough passes the poke test, take it out onto your dusted working surface.
・Weigh the dough and divide into two using a scraper.
※Do not tear the dough; otherwise, the gluten structure is destroyed.
〈Bench-Rest〉
・Shape the divided dough into a ball, stretch the surface and make a skin on. This is a preshaping for the final shape. Cover and let it rest for 15 to 20 mins.
※While resting, the gluten relaxes, and you can easily shape it into the final shape.
※Cover with a piece of plastic wrap or damp towel.
〈Grease the mold〉
While Bench Resting, grease the inside of the mold.
※I am using vegetable oil spray, but you can do it by your hand. Drop a teaspoon of vegetable oil, and spread it all over the mold.
※I recommend using vegetable oil over butter because there is less chance to stick to the side. Butter contains milk solids, and it might burn and sticks the dough.
〈Shaping〉
・When shaping Shokupan, what we keep in mind is, form a tight outer "skin" and results in a higher rise and better form.
1) Place the dough smooth side down. Roll the dough out gently to remove the gas. Do not go too far so that your dough will have more uniform tiny gas holes.
2) Fold from top and bottom, and make a rectangle shape.
3) Roll it up while tacking the dough. Pinch to seal the end.
4) Place in the greased mold. Be careful with the direction.
5)Cover the mold and go on to the final rise.
〈The Final Rise〉
・ Let the dough rise at a warm place; it should not higher than 30℃/86℉)for for 40 to 50 mins until the dough rises 1cm under the edge. (over the edge when you make a mountain shape.)
Go on to the next video
〈The Final rise〉※ Start preheating the oven to 100 ℃ (212℉.)
・Let the dough rises at a warm place; it should not higher than 30℃/86℉)for for 40 to 50 mins until the dough rises 1cm over the edge.
※You should keep your eye on the dough for the last 10 mins.
※We are going to bake the Beginner's SHOKUPAN in mountain shape, so let it rise 5 to 10 minutes more until the dough rises 1cm over the edge.
〈Baking: The Cold Start Method〉
Have your oven preheat to 100 ℃(212℉) at the last 10 to 15 minutes of the final rise.
(My oven takes 10 minutes to reach 100℃.)
"The Cold Start Method" is putting the bread into a cold oven(100℃ in this case); it's not literally "cold" but much lower than the normal baking temperature.
Start baking at 100℃, then re-set the oven to 200℃, continue baking it 40 mins in total to make sure to cook through.
It depends on each oven to reach 200℃. It doesn't make a big difference if it takes a little bit longer or shorter. My oven takes 15 to reach 200 ℃.
All you have to do is just keep baking the 40 mins.
※Rotate the mold halfway through.
※Cover with aluminum foil if the surface starts browning.
〈How to store your SHOKUPAN〉
※SHOKUPAN is too soft to slice the day you baked, I recommend slicing it the next day.
・Decide how much you'll use up within a day or next day, and store it at room temperature.
・Slice the remainder of the loaf into desired thickness for toast.
・If you want to make a sandwich, wrap 2 thin slices of individual packets.
・Place in a bread bag, and freeze.
※Well freeze up to a month.
How thick you like your toast?
Interestingly enough, there are strong regional preferences for the thickness of the toast. In the Kanto (Tokyo) area, people like thin slices around 1 to 1.5cm (0.4 to 0.6 inch). In Kansai (Osaka) area, people like around 1.5 to 2 cm thick(0.6 to 0.8 inch) slices.
Try both thicknesses to find out the differences!
The Regular SHOKUPAN by stand-mixer kneading.
3 lecturesStand-mixer Kneading
〈Preparation〉
Check the room, flour, temperature beforehand. Then adjust the liquid temperature.
Please watch my former video for a detailed explanation if you haven't watched it.
→Lecture 4: Begginer's SHOKUPAN preparation
〈Mix the ingredients〉
・Put the bread flour into the stand mixer bowl and add in salt and sugar.
With the dough hook attached stand mixer, start mixing on low speed (2 KitchenAid). Run the mixer until evenly mixed.
・And then add in the instant dry yeast.
※I am adding yeast after the sugar and salt because the salt might affect the yeast activity. The salt might kill or slower the yeast activities.
・With the mixer running, add in milk and water mixture slow and steady stream. Keep the mixer on low speed until it forms a dough.It's going to take about 1 to 2 minutes.
・Increase the speed to medium, if you're using a KitchenAid, increase the speed to four, and then knead for 5-6 minutes to build up the gluten structure.
〈The Windowpane Test 1〉
・After 5 minutes of kneading, let's check the gluten structure has developed or not.
・Take a small piece of the dough, about the size of the ping pong ball. Hold it between your thumb and first two fingers and stretch it.
・If the dough stretches like paper-thin, and it looks like a translucent membrane, it's good to go.
※If the dough breaks, knead another a couple of minutes to give it strength. And give it the windowpane test again.
The windowpane test is one of the best ways to tell if your dough is sufficiently kneaded.
〈Add in unsalted butter〉
・If your dough passed the windowpane test; it's time to add unsalted butter.
・Keep the mixer running on low (2 KitchenAid)
The dough will separate, and it seems like you are failed in kneading. But no worries, the dough will soon come back together. After adding the butter, the dough becomes more smooth and elastic.
・Knead until the butter is fully incorporated and makes it elastic and shiny, and smooth.
The reason why adding butter at the last minute of kneading is;
The butter is hurting the developed gluten structure. If you add butter at the early stages of the kneading, the gluten will not fully develop and makes a crisper texture.
〈The Windowpane Test 2〉
・Ckeck the dough by giving it a windowpane test again.
If you can stretch the dough without it breaking, that means the gluten is well-developed, and your dough is ready to rise.
・Transfer the dough into a greased bowl.
※Most of the recipe says the dough should not stick to the side of the bowl at the last stages of the kneading process, but not in this case.
〈Shape into a ball〉
・Put it in a greased bowl and cover it with a piece of plastic
※It's a wet dough so it's not easy to shape by hand, so, use a spatula to give the tension on the surface. You don't have to be too far, but make a skin on the surface.
※The surface skin should hold the gas inside, while fermenting.
〈Take the dough temperature〉
・Check the dough temperature if you want to go precise.
This is not mandatory because usually, I don't do it.
The more you bake, you can do it without checking the dough temp.
※If you are a beginner and are not sure you are on the right track, check the dough temperature.
Somewhere between 22 to 24 ℃ (72 to 75℉) is good.
〈The Final rise〉※ Start preheating the oven to 100 ℃ (212℉.)
・Let the dough rises at a warm place; it should not higher than 30℃/86℉)for for 40 to 50 mins until the dough rises 1cm under the edge when you make a square shape, over the edge when you make a mountain shape.
※You should keep your eye on the dough for the last 10 mins.
※When you bake the bread with the lid on, there should be room for expansion.
✖︎ Do not go too far; otherwise, the dough stack in between the lid and the mold, or the dough is going to flow out and make a mess in your oven.
※We say Shokupan with "White line" on edge is perfect.
※If your dough rises higher than 1cm below the edge, think about baking a mountain shape. In that case, the dough should rise 1cm over the edge. Before putting it in the oven, spray water to give it moisture. The moisture prolongs the time to set the surface so that the dough fully springs in the heat.
〈Baking: The Cold Start Method〉 ※ Start preheating the oven to 100 ℃
"The Cold Start Method" is putting the bread into a cold oven(100℃ in this case) and then gradually increases the heat up to 200 ℃, to make sure to cook through. Start baking at 100℃, then re-set the oven to 200℃, continue baking it 40 mins in total.
If your dough maintains strength when you put it in the oven, it will spring in the oven and fill the mold.
Rotate the mold halfway through.
If you are baking a mountain shape, cover with aluminum foil if the surface starts browning.
After 40 mins of baking, take out the mold and slice off the lid.
Tap the mold onto a countertop to remove hot air inside, to prevent it from shrinking. Then, take out onto a wire rack.
Let it cool to room temperature before cutting.
Shokupan is a large volume of bread, so if you start baking at an average bread baking temperature like 200℃, there would be a chance to burn just the outside. And the inside is undercooked. Moreover, the dough would not fully spring in the oven.
〈finish baking 〉
・How to tell the Shokupan is properly baked?
Here is what you should check if you are not sure about it.
1) If your Shokupan looks golden brown and slides out easily from your mold, it's done.
Take out the Shokupan mold from the oven and take the lid off.
※Tap your mold onto the working surface and take the Shokupan out. If your bread slides out easily, it is baked properly.
2) Tap the bottom, and you HEAR a Dry, Hollow sound; it's done.
Take your bread upside down, and tap the bottom. And you hear a hollow sound; it's properly baked.
And if you feel the weight lighter than it looks, that's another indicator for properly cooked.
3) Take the Internal Temperature
Insert a thermometer into the center of the Shokupan right after taking it out from the oven. (Insert at an angle to minimize the visual damage.)
If the thermometer shows over 90℃(194℉), It's finished baking.
In anyways, follow my instruction precisely.
※Do not shorten the time if you are bake in an electric oven.
※If you are using a gas oven, you may shorten the time to 5 mins or so.
Baker's Percentage
1 lectureNow let's talk about Baker's Percentage.
Once you know the Baker's Percentage, you can easily scale recipes up or down.
How to calculate the dough to fit your pan.
1 lectureCalculating the dough is critical when you bake SHOKUPAN.
If you did wrong, the bread comes out short or not enough to make a square shape.
I need a little bit of math, but I tried to make it as simple as possible.
HOPE it's helpful!
A short History of Japanese Bread
1 lectureJapan is famous for its rice-based food culture.
However, we love bread as much as rice.
To tell you the truth, many people (including me) prefer toast and coffee for breakfast over a bowl of rice and miso soup.
Let me tell you the History of Bread in Japan.
How to enjoy your SHOKUPAN
1 lectureHow to enjoy your SHOKUPAN!
Recipe card for various size pan
1 lectureRecipe for various size pan for you!
Description
🎉 Welcome to the ultimate Pastry Course, where you will embark on a delightful journey to master the art of baking SHOKUPAN—the famous Japanese milk bread—right in the comfort of your home! 🍞
This course is not just about making SHOKUPAN, but also covers essential bread-baking skills that will elevate your baking game. 🌟
- Discover why Japanese SHOKUPAN is unlike any other bread.
- Learn the secrets to baking the perfect loaf of SHOKUPAN every single time. 🥖
- Understand the importance of weighing ingredients accurately.
- Get to know the essential ingredients for baking bread.
- Explore the differences between various types of flour and yeast.
- Master the art of fermentation for optimal bread texture.
- Calculate your bread dough to perfectly fit your bread pan. 📏
- Demystify the concept of Baker's Percentage for consistent results.
- Decide between no-knead or well-knead methods and when each is appropriate.
- Choose between the straight-dough method or sponge-dough method for the best outcome.
- Learn the difference between a gas oven (with fan-assistant) and an electric oven.
- Experiment with the Cold-Start Baking Method for unique results. ❄️
- Savor your freshly baked SHOKUPAN slices in creative ways!
- Uncover the history of Japanese bread and its cultural significance. 📚
- Hand knead your dough and turn it into a full body exercise to improve your skills and fitness. 💪
- And much more to discover as you dive deeper into the world of pastry! 🎂
Course Reviews
-
😀 Trucly Nguyen
-
😀 Kimberly Rudel Johns
-
😀 Jose Manuel Suenaga Hironaka
-
😀 Jason Cassar
-
😀 Te18ddy7M
apposto
-
😀 Cory Robinson
-
😀 TJ Penn
-
😀 Mamie
-
😀 Jesmond Tony Mizzi
-
😀 Patience Attoh
-
😀 Kiko Abik
-
😀 Stephen Sy
-
😀 Mani Tarrant
-
😀 Tina Yu
-
😀 Cailey Ross
-
😀 Billie
-
😀 Gina Eunice Cabrera González
-
😀 Manee Morrison
-
😀 Jean-Luc Helmcke
-
😀 Stephanie Yeo
Shokupan bread is one of those I’m most keen to learn how to make. Thanks to the detailed course information and tips given, I have gain more confidence in making this bread. The texture of this bread is truly like none other. Moreover, teacher Akino is very helpful in answering my questions. I have thoroughly enjoyed the learning process.
-
😀 Joanna Herrera
-
🙁 Roverne Son
-
😀 Esther Yadana
-
😀 Kook Tanaporn
-
😀 Martin Schwarz
-
😀 Matthew Brodkin
Everything you could ever need to make authentic shokupan

