Ingredients
Chocolate sponge biscuit
Custard fillers
Custard
Soaking
Instructions
Step 1
Step 2
Step 3
Step 4
Step 5
Step 6
Step 7
Step 8
Servings
✨Serving Suggestions✨
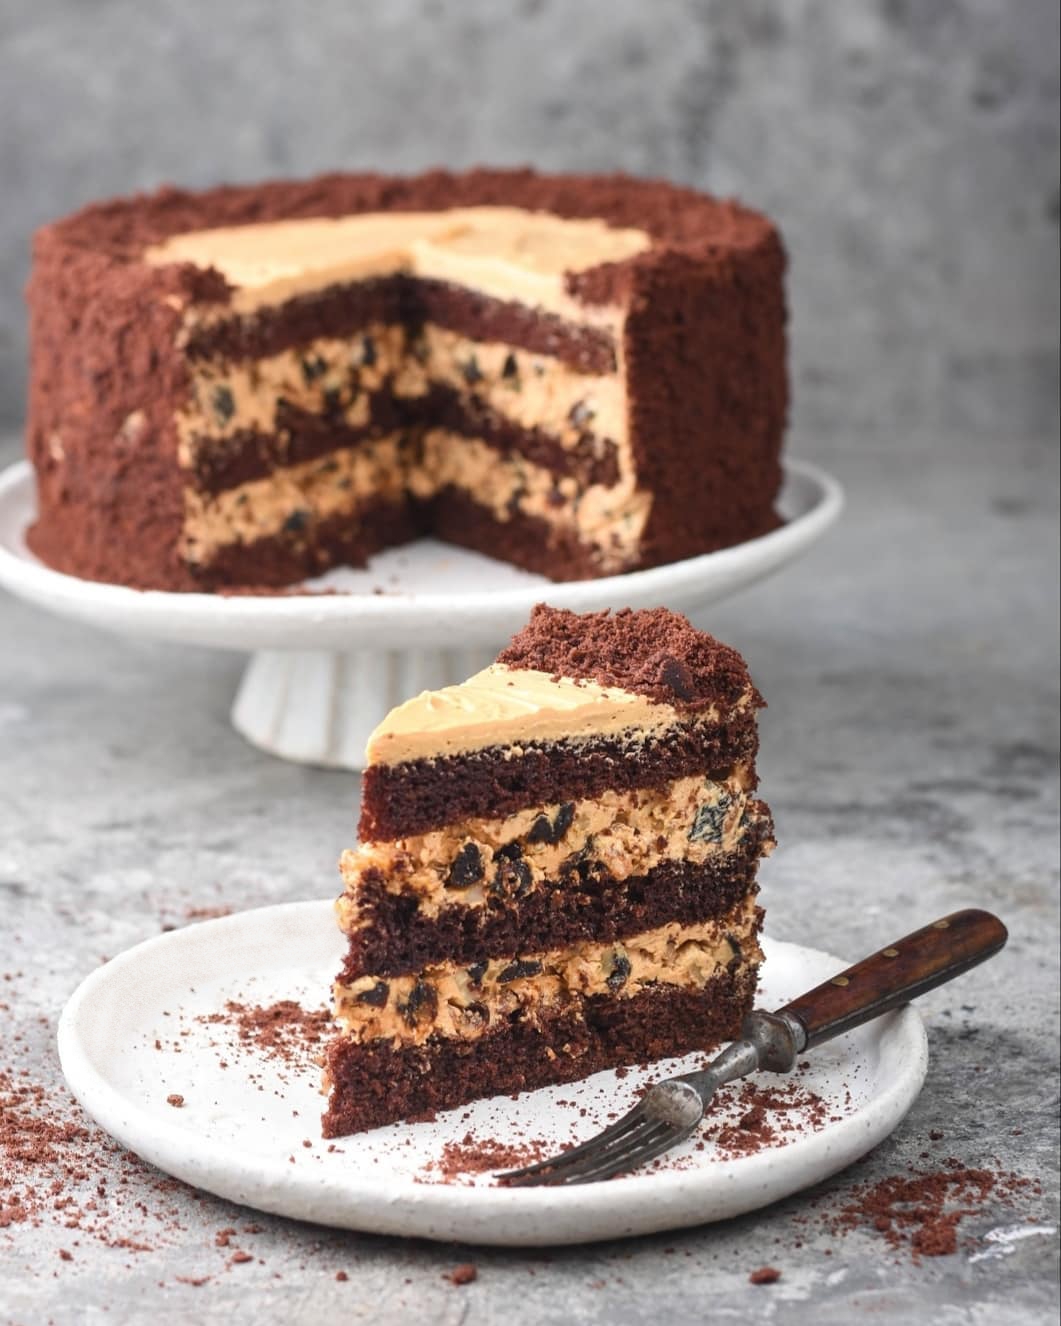
Once your cake is assembled and looking gorgeous, it's time to think about presenting this masterpiece. Serve it on a chic cake stand to make a statement. You can dust the top with a light coating of cocoa powder or icing sugar for extra flair.
Pair a slice with a dollop of freshly whipped cream 🧁, or better yet, a scoop of vanilla ice cream 🍨. The combination of warm cake and cold ice cream is a hit every time. If you're going the coffee route, a fragrant espresso ☕️ is a fantastic companion to highlight the cake's rich flavors.
Feeling extra fancy? Add some seasonal berries around the cake for a pop of color and a touch of freshness. Strawberries 🍓, raspberries, or even a few mint leaves 🌿 can elevate the dessert to another level. Share your creation with friends or savor it alone—this cake makes every moment special!
Equipment
You'll need several bowls of different sizes for mixing the various components. Opt for stainless steel or glass bowls for better temperature control.
An electric stand or hand mixer will make whipping the eggs and cream much easier. Speed control is crucial for achieving the right texture.
A silicone spatula is perfect for folding ingredients gently and ensuring you scrape every bit from the bowl.
Line your baking pan with parchment paper for easy cake removal and no sticking, making clean-up a breeze.
A reliable oven with accurate temperature control is essential. Preheat your oven to 180°C (356°F) before starting to bake.
A 22-24 cm (8.7 to 9.5 inch) round baking pan is ideal for this recipe. Non-stick pans can be helpful, but parchment lining is a good backup.
Use wooden or metal skewers to check the doneness of your cake. If it comes out clean, your cake is ready!
Variations
Gluten-Free Variation
Swap out the all-purpose flour with an equal amount of gluten-free flour blend. Ensure that all other ingredients, such as baking powder, are certified gluten-free.
Vegan Variation
Replace the eggs with a mixture of 2 tablespoons flaxseed meal and 6 tablespoons of water—let it set for 5 minutes. Use dairy-free butter, mascarpone, and condensed milk such as coconut-based alternatives.
Don’t worry, these changes won’t compromise the flavor. Your cake will still be irresistible! 😋
Faq
- Can I use a hand mixer instead of a stand mixer?
Yes, a hand mixer works just as well. Just make sure to use it at a medium speed for whipping eggs and mixing batters.
- Why should I sift the dry ingredients?
Sifting helps to evenly distribute the baking soda and baking powder, ensuring a more uniform texture in your sponge cake.
- How do I know if my sponge cake is done?
Insert a skewer into the center of the cake. If it comes out clean or with a few moist crumbs, your cake is ready!
- Can I substitute the prunes with other dried fruits?
Absolutely! Dried apricots, raisins, or cherries are great alternatives that will offer a fun twist on the original recipe.
- How long can the assembled cake be stored?
The cake can be stored in the fridge for up to 3 days. Just make sure to cover it to prevent it from drying out.
- Can I freeze the sponge biscuit?
Yes, you can freeze the sponge layers for up to a month. Wrap them well in plastic wrap and foil to prevent freezer burn.

