Ingredients
Dough Ingredients
 Bob's Red Mill Gluten Free 1-to-1 Baking Flour, 22 Ounce (Pack of 4)
$23.96
View details
Prime
 Antimo Caputo Chefs Flour - Italian Double Zero 00 - Soft Wheat for Pizza Dough, Bread, & Pasta, 2.2 Lb (Pack of 2)
$16.99
View details
Prime
best seller
 King Arthur, Measure for Measure Flour, Certified Gluten-Free, Non-GMO Project Verified, Certified Kosher, 3 Pounds, Packaging May Vary
$8.62
View details
Filling Ingredients
Instructions
Step 1
Start by **weighing all ingredients** beforehand, ensuring accuracy is key to a perfect dough. In a large bowl, combine the **flour** and **salt** together.
Next, begin to **pour in the boiling water** while stirring the mixture with a fork. This step helps in creating a pliable texture.
Once all the hot water has been added, mix in the **vegetable oil** and **egg** quickly. It’s important to combine everything thoroughly.
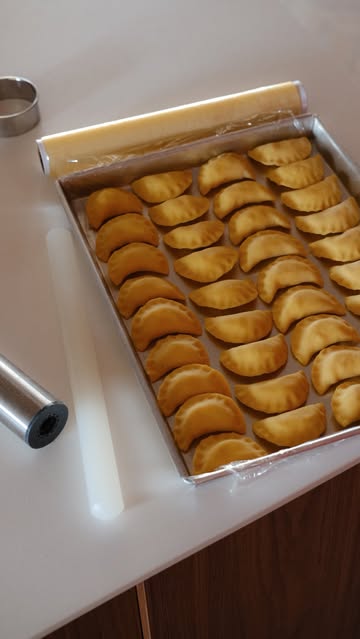
When the mixture has cooled slightly, you can switch to using your hands. **Knead the dough** briefly until it is smooth. Shape the dough into a ball, wrap it in plastic wrap, and refrigerate for **30 to 40 minutes**. For best results, let it sit overnight.
Step 2
In a separate bowl, combine **cottage cheese** with **1 egg** and add **salt to taste**. For more flavor, I recommend using about **5 grams of salt**.
Mix all the ingredients together until well combined. This filling will provide a **savory and rich flavor** to your varenyky.
Step 3
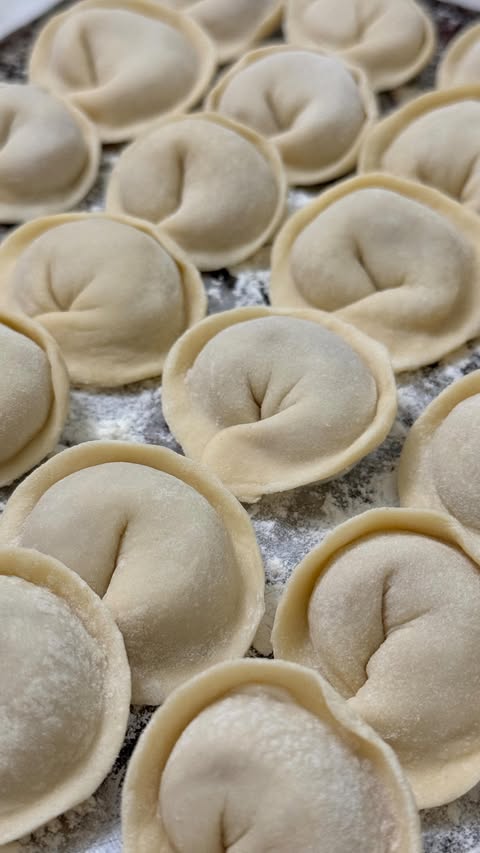
The **fresh varenyky** can be boiled for **1 to 2 minutes** once the water resumes boiling, especially if they are rolled thin.
If you are using **frozen varenyky**, extend the boiling time to **4 to 5 minutes**. After cooking, mix the varenyky with **butter** and serve them with **sour cream** or **Greek yogurt** for a delicious finish.
Remember, you can **freeze** the varenyky for up to **1 month** without compromising their taste.
Servings
Once your Varenyky are ready, the way you serve them can elevate the whole experience!
**Pair them with a dollop of sour cream or Greek yogurt** to add a creamy texture that complements the savory filling. 🌟 Consider adding a sprinkle of fresh herbs or chopped chives on top for a burst of flavor and color.
For a little extra indulgence, melt some butter on warm Varenyky before serving. The butter will add a luscious richness that enhances every bite. Spread some cheese over the top for a delightful twist! 🎉
Lastly, if you’re feeling adventurous, think about serving your Varenyky with sautéed onions or crispy bacon bits for a savory topping. This gives a nice crunch and extra flavor that everyone will enjoy!
Equipment
Choose a sturdy mixing bowl to handle the dough ingredients. A larger bowl helps prevent spills when adding boiling water!
 YIHONG 7 Piece Mixing Bowls with Lids for Kitchen, Stainless Steel Mixing Bowls Set Ideal for Baking, Prepping, Cooking and Serving Food, Nesting Metal Mixing Bowls for Space Saving Storage
$27.99
$35.99
View details
Prime
best seller
 Pyrex Glass, 3-Piece, 3 PC Mixing Bowl Set
$17.53
View details
Prime
 REGILLER Stainless Steel Mixing Bowls (Set of 5), Non Slip Colorful Silicone Bottom Nesting Storage Bowls, Polished Mirror Finish For Healthy Meal Mixing and Prepping 1.5-2 - 2.5-3.5 - 7QT (Colorful)
$26.99
View details
A fork is great for mixing the boiling water with flour. It helps to keep your hands safe from the heat!
 Hiware 12-piece Stainless Steel Salad Forks Dessert Forks Set, Dishwasher Safe, 6.7 Inches
$8.99
View details
Prime
 Yosoo Metal Bread Box Kitchen Countertop Multi Function Bread Fork for Bakery red
$36.91
$39.35
View details
Prime
best seller
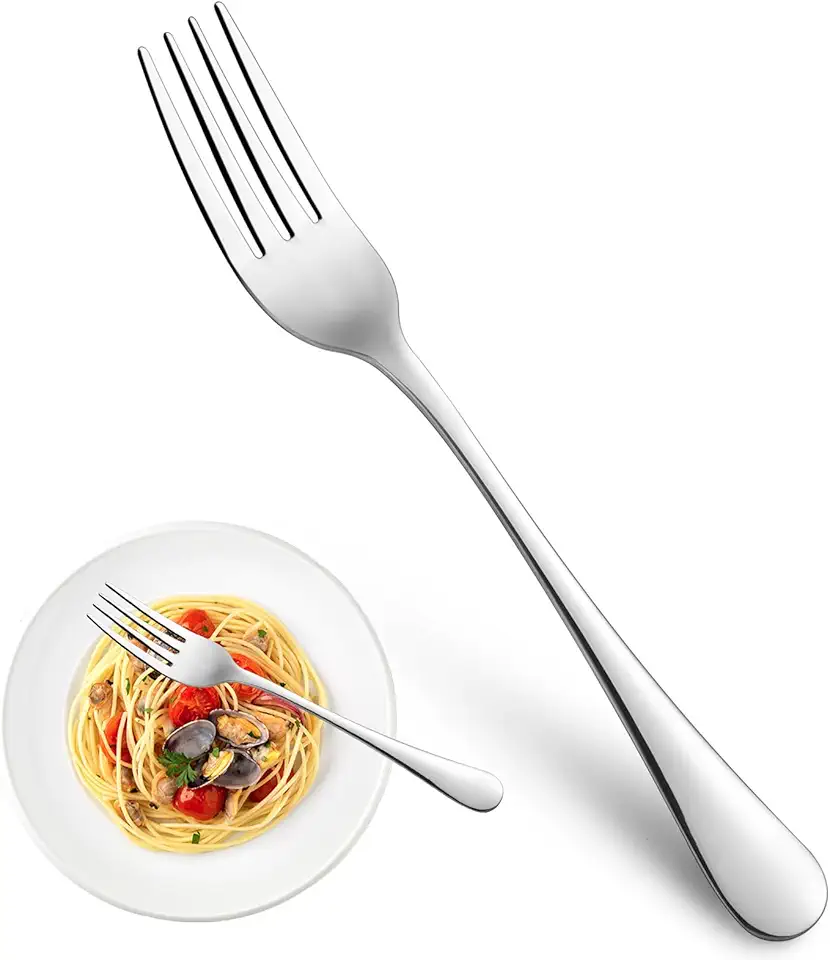 Dinner Forks,Set of 16 Top Food Grade Stainless Steel Silverware Forks,Table Forks,Flatware Forks,8 Inches,Mirror Finish & Dishwasher Safe,Use for Home,Kitchen or Restaurant
$9.99
$15.99
View details
Keep your dough moist by wrapping it in plastic wrap while it rests in the fridge. This will prevent it from drying out.
 Glad® Press'n Seal® Plastic Food Wrap - 100 Square Foot Roll - 3 Pack (Package May Vary)
$12.72
$14.97
View details
Prime
best seller
 Morepack Clear Self Sealing Cellophane Bags,4x6 Inches 200 Pcs Cookie Bags Resealable Cellophane Bag for Packaging Cookies, Candy and Products
$7.21
$8.49
View details
Prime
 Glad Press'n Seal Plastic Food Wrap - 70 Square Foot Roll
$4.49
$7.84
View details
A rolling pin will help you get your dough to the perfect thickness for shaping your Varenyky. If you don’t have one, a wine bottle can work in a pinch!
 Farberware Classic Wood Rolling Pin, 17.75-Inch, Natural
$12.99
$13.99
View details
Prime
 Fox Run Polished Marble Rolling Pin with Wooden Cradle, 10-Inch Barrel, White
$20.88
View details
Prime
 French Rolling Pin (17 Inches) –WoodenRoll Pin for Fondant, Pie Crust, Cookie, Pastry, Dough –Tapered Design & Smooth Construction - Essential Kitchen Utensil
$9.99
View details
Variations
Looking for some tasty alternatives? **You can easily adapt this recipe to be gluten-free** by swapping regular flour for a gluten-free mix! 🌾
For those following a vegan lifestyle, try using **flaxseed meal mixed with water as a replacement for the egg** in the dough and filling. This creates a lovely texture without compromising taste! 🌱 You can also use silken tofu blended with nutritional yeast instead of cottage cheese for a savory filling that's vegan-friendly!
Faq
- Q: Why do I need to use boiling water for the dough?
A: Boiling water makes the dough easier to work with, resulting in a pliable and elastic texture!
- Q: How do I know when my Varenyky are fully cooked?
A: Fresh Varenyky will float to the top when they are done cooking, typically around 1-2 minutes after boiling resumes!
- Q: Can I make the dough in advance?
A: Absolutely! You can prepare the dough a day ahead and store it in the fridge wrapped tightly in plastic. Just let it come to room temperature before rolling out.
- Q: What's the best way to store leftover Varenyky?
A: Leftover cooked Varenyky can be stored in the fridge for a couple of days. Alternatively, freeze uncooked Varenyky on a baking sheet, then transfer them to a bag for long-term storage!
- Q: How can I ensure my filling doesn’t become watery?
A: Use thicker cottage cheese and drain any excess liquid beforehand; this will keep your filling creamy without becoming runny!
- Q: I want my Varenyky to have a golden color; how can I achieve that?
A: Brush the Varenyky with an egg wash before boiling or baking to create that lovely golden color!

