Ingredients
Ingredients
Instructions
Step 1
Before you start, it’s essential to arrange your workspace for an enjoyable experience. Ensure all your materials, including the thin Saracino wafer paper, edible colors, and water, are within reach.
Clear any clutter and have a workspace that inspires creativity. Light some candles or play soft music if it helps you focus!
Step 2
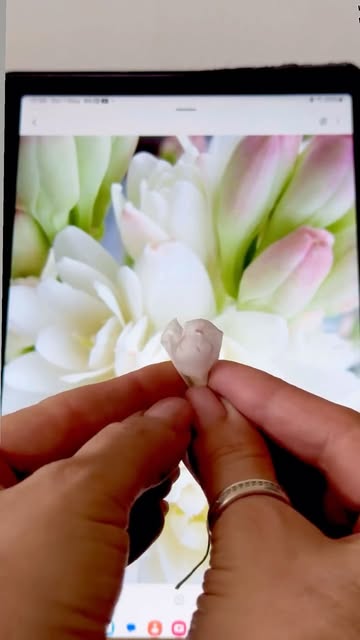
Using scissors, cut the wafer paper into petal shapes. Consider creating various sizes for depth and dimension in your flower.
Be gentle as the paper is delicate. Remember, *imperfections add character* to your flower!
Step 3
Using the edible colors, gently paint the petals to give them life and vibrance. Apply the colors in layers, allowing each layer to dry before adding more.
*Experiment with gradients* and blending; this brings a beautiful realism to your flowers!
Step 4
Once painted and dried, lightly shape the edges of the petals with your fingers. *Curling* the edges slightly can give them a more natural appearance.
Keep in mind the shape that you desire for the final flower. The more natural the petal looks, the better!
Step 5
Begin to layer the petals on top of one another, starting from the smaller center petals and working your way outward. Use a drop of water to help stick them together if necessary.
Be creative; adjust the angles and positions until you achieve your desired look. *This is your moment to shine* and let your creativity soar!
Step 6
After assembling, allow your flower to dry completely. Consider adding additional touches, like leaf shapes or glitter, if desired.
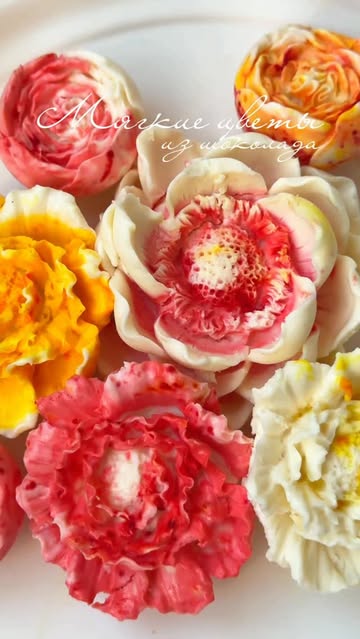
Once dried, display your beautiful wafer paper tuberose as a center piece or decoration for cakes. *Enjoy your incredible creation!*
Servings
Once you've beautifully crafted your tuberose flowers, you can use them in a variety of creative ways! For a stunning centerpiece at your next **event** or **party**, arrange the flowers in a small vase filled with colorful pebbles or sand. Add a few real greens or sprigs of herbs around them for a charming touch!
Thinking about **gifting**? Attach these delicate flowers to cookies, cakes, or cupcakes. They’ll add a personalized flair to any sweet treat! Imagine the smiles when your friends receive beautiful goodies adorned with your handcrafted blooms! 😍
For something a bit different, try placing the flowers on **hand-made cards** or gift wraps. They can bring a vibrant and sophisticated touch to your messages, making your gifts unforgettable!
Equipment
For this recipe, use Saracino wafer paper (0.30 thickness) for the best results. Make sure to keep it sealed until you're ready to use it to maintain its texture!
Choose vibrant edible colors to enhance the beauty of your flowers! Gels work best as they provide rich tones. Mix with a few drops of water for painting.
Keep a pair of sharp scissors handy for precise cutting of the petals. A steady hand will help create beautiful, clean edges!
Variations
Don’t worry, friends! If you're looking to make this project gluten-free or vegan, you can easily adapt it. The essential ingredients in this recipe—the wafer paper and edible colors—are naturally gluten-free! Just ensure that the edible colors you choose are also vegan-friendly, as some may contain animal-derived ingredients.
**Tip:** If you're feeling adventurous, try adding natural colorants for a more organic approach, like beet juice for reds or spirulina powder for greens. The results are stunningly unique and delightfully **healthy**! 🌱
Faq
- Can I use any type of wafer paper for this project?
For best results, stick to thin wafer paper, like Saracino (0.30). It’s easier to work with, and you’ll get a more realistic finish.
- How do I store my wafer paper flowers once they are made?
Keep them in a cool, dry place, away from direct sunlight to prevent them from wilting. You can place them in an airtight container for longer-lasting freshness!
- What if I want to create multiple flower types?
Feel free to experiment! You can adjust the petal shape and size for different flowers. Study the petals of real blooms for inspiration!
- Can I use these flowers outdoors?
While beautiful, wafer paper flowers are best suited for indoor use as humidity and wind can damage them. Use them on tables or centers you plan to showcase indoors.
- What techniques can I use to create dimension in the flower petals?
Gently shaping the petals with your fingers or using a soft brush to curl the edges can create lovely depth and realism in your flowers.
- How can I make my edible colors more vibrant?
Start with a high-quality gel food color and mix it with a bit of water. Experiment with layering colors for even more depth!

