Ingredients

Instructions

Step 1

Step 1: Preheat the oven to 356°F (180°C).Make sure the oven is properly preheated before starting to bake.

Step 2

Step 2: In a clean bowl, whip the egg whites with a pinch of salt until stiff peaks form. Using a clean, dry bowl ensures better whipping results.

Step 3

Step 3: In another bowl, whip the egg yolks with the sugar until the mixture becomes pale and fluffy. Be patient; this can take a few minutes.

Step 4

Step 4: Melt the chocolate and butter together in a water bath and let it cool slightly. Then, pour this mixture into the whipped yolks and mix with a spatula. Stir gently to maintain the airy texture.

Step 5

Step 5: Carefully fold in the whipped egg whites until the batter is well combined. Be gentle to keep the mixture light and airy.

Step 6

Step 6: Wrap the bottom of 18 cm (7.09 inch) cake rings with foil and place a circle of baking paper inside. Put these on an oven rack. Foil prevents the batter from leaking out.

Step 7

Step 7: Pour the batter into the prepared rings and bake for 10-12 minutes. Check with a toothpick to ensure it's baked through.

Step 8

Step 8: Once baked, turn the cake rings upside down and let the sponge cool on a wire rack. Cooling upside down prevents it from sinking.

Step 9

Step 9: For the meringue, heat the sugar and egg whites in a water bath to 131-149°F (55-65°C), until the sugar dissolves. Then whip until strong peaks form. Ensure your bowl is completely dry and clean.

Step 10

Step 10: Pipe meringue hearts onto a silicone mat and dry them in the oven at not higher than 158°F (70°C) for about 2-2.5 hours. Check frequently to avoid over-drying.

Step 11

Step 11: For the cream, heat the 200 grams of cream with the vanilla seeds. Melt the white chocolate in a water bath. Mix the hot cream with the melted chocolate using a whisk until smooth, then gradually whisk in the 350 grams of cold cream.Incorporating the cold cream slowly helps to create a smooth consistency.

Step 12

Step 12: Refrigerate the cream mixture for 8-10 hours. This allows the cream to set properly.

Step 13

Step 13: Whip the cooled cream mixture until fluffy. Be cautious not to overwhip, to maintain its delicate texture.

Step 14

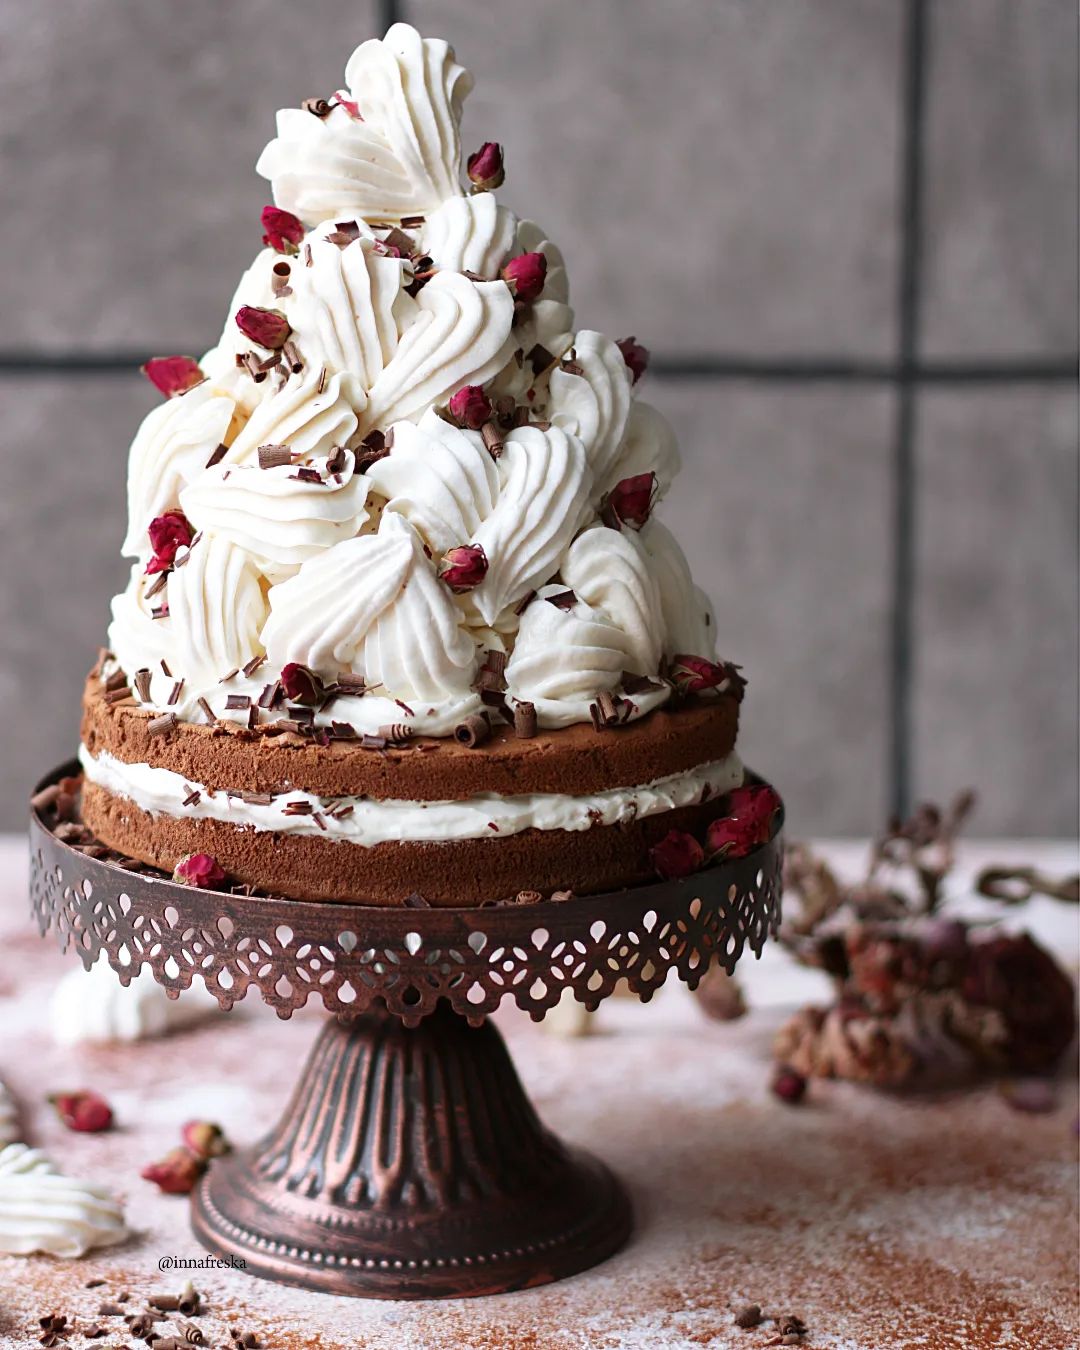
Step 14: Assemble the cake by covering the sponge layers with the whipped cream, lay the meringue on top, and cover with more cream. Drizzle with melted chocolate or decorate with chocolate chips.Let the assembled cake stand for 10-15 minutes before serving.

Servings

Imagine a sunny afternoon, a cozy blanket laid out, and a picnic basket filled with delightful treats. This **Flourless Chocolate Meringue Cake** is the pièce de résistance of any gathering. Slice it up and serve with some fresh berries and a sprinkle of powdered sugar for that extra wow factor 🍓. For a bit of decadence, drizzle some warm chocolate sauce over each piece—absolute bliss! 🍫 Why stop there? Pair it with a refreshing glass of Prosecco or a warm cup of rich coffee ☕. The contrast of the cake's sweetness with the coffee's slight bitterness creates pure harmony. You could even turn it into a show-stopping dessert platter: Arrange slices next to mini cream puffs, fresh fruit skewers, and a bowl of whipped cream 🍇🥝. Your guests will be talking about this for weeks!

Equipment

Wire Rack

Cooling the cake layers on a wire rack helps them cool evenly and avoids sogginess. It's an essential tool for perfect texture.

We recommend:

Variations

🍀 For those who need a gluten-free option, rest easy! Replace the butter with coconut oil, and make sure your chocolate is certified gluten-free. That's it! The sponge biscuit recipe is already flourless. 🌱 Want a vegan twist? Substitute the egg whites in the meringue with aquafaba (chickpea water) and replace the butter with a vegan margarine. For the cream, use coconut cream instead of whipping cream, and opt for dairy-free white chocolate. Going gluten-free or vegan doesn’t mean you have to sacrifice flavor or luxury. Everyone deserves a bite of this chocolatey dream!

Faq

  • Can I use a hand whisk instead of an electric mixer?

    While it’s possible, using a hand whisk will be much more labor-intensive and may not achieve the same fluffy texture. An electric mixer is highly recommended.

  • My meringue isn't achieving stiff peaks. What am I doing wrong?

    Make sure your bowl and beaters are completely clean and free of any grease. Also, ensure you're gradually increasing the mixing speed.

  • Why did my sponge biscuit turn out dense?

    A dense sponge may result from over-mixing the batter or not incorporating the egg whites gently enough. Fold the egg whites in carefully to maintain airiness.

  • How do I know when the meringue hearts are done?

    The meringue should be dry and lift easily from the silicone mat. Keep an eye on them to ensure they don’t brown, which may indicate too high a temperature.

  • Can I prepare the cake layers in advance?

    Absolutely! You can make the sponge biscuit and meringue hearts a day ahead. Store the biscuit wrapped in plastic and keep the meringue in an airtight container.

  • What's the best way to store the finished cake?

    The assembled cake can be refrigerated for up to 2 days. Ensure it's covered to maintain freshness and prevent the meringue from softening.

Nutrition facts

Heart wrecks cake with meringue
Recipe Yield:8 servings
Calories:250-300 calories per serving
Calories (Min - Max):250 - 300
Total Fat:18g
Saturated Fat:11g
Protein:4g
Total Carbohydrate:24g
Total Sugars:21g