Ingredients

Pistachio Sponge Biscuit

  • 6 large eggs
  • 160 grams (5.6 ounces) sugar
  • 130 grams (4.6 ounces) flour
  • 50 grams (1.8 ounces) butter
  • 50 grams (1.8 ounces) white chocolate
  • 7 grams (0.25 ounces) starch
  • 50 grams (1.8 ounces) pistachio paste
  • 10 grams (0.35 ounces) baking powder
  • pinch of salt

Pistachio Mousse

  • 300 grams (10.6 ounces) heavy cream
  • 130 grams (4.6 ounces) milk
  • 8 grams (0.28 ounces) gelatin
  • 90 grams (3.2 ounces) white chocolate
  • 20 grams (0.7 ounces) sugar
  • 50 grams (1.8 ounces) pistachio paste
  • green dye to taste

Strawberry Jelly

  • 400 grams (14.1 ounces) strawberry puree
  • 20 grams (0.7 ounces) gelatin
  • 40 grams (1.4 ounces) sugar

Frosting

  • 560 grams (19.7 ounces) cream cheese
  • 45 grams (1.6 ounces) powdered sugar
  • 185 grams (6.5 ounces) butter

Equipment

  • Mixing Bowls

    Use various sizes to keep ingredients separate and make mixing easy. Non-slip ones are especially helpful.

  • Whisk and Hand Mixer

    A whisk is great for quick tasks, while a hand mixer will save your arms when whipping egg whites and mousse.

  • Baking Ring or Mold

    An 18cm ring is perfect for this cake. Using acetate film will ensure perfect layers.

  • Sifter

    Make sure to sift your dry ingredients to avoid lumps and ensure a smooth batter.

  • Spatula

    A rubber spatula will help you gently fold in whipped ingredients without deflating them.

  • Oven Thermometer

    This ensures your oven is at the correct temperature, crucial for perfect baking.

  • Cooling Rack

    Allows your cake layers to cool properly before assembly.

Instructions

Step 1

**Pistachio Sponge Biscuit**

Step 2

1. Sift the flour with cornstarch, salt, and baking powder. Sifting ensures there are no lumps and everything is well combined.

Step 3

2. Melt the butter with white chocolate in a water bath, stirring. Make sure not to overheat to prevent the chocolate from burning.

Step 4

3. Separate the eggs into yolks and whites.

Step 5

4. Whip the yolks with sugar until fluffy and light creamy mass. This should take about 5-7 minutes of whisking.

Step 6

5. Add the pistachio paste and whip for another 1-2 minutes until evenly colored. Add a drop of green dye if desired.

Step 7

6. Pour in the melted chocolate and butter, and whip until smooth.

Step 8

7. Separately, whip the egg whites until stiff peaks form.

Step 9

8. Combine the whipped egg whites and flour mixture into the yolk mixture in three passes. Gently fold to preserve the airy texture.

Step 10

9. Preheat the oven to 356°F (180°C). Pour the dough into a prepared ring or mold.

Step 11

10. Bake the pistachio biscuit for about 40-45 minutes. Check for doneness with a dry skewer.

Step 12

11. Cool the finished biscuit, wrap it with film, and refrigerate for several hours. Then, cut it into three layers before assembly.

Step 13

**Pistachio Mousse**

Step 14

1. Heat the milk with sugar until warm. Add the white chocolate, and stir until the chocolate dissolves.

Step 15

2. Add the swollen gelatin and mix well.

Step 16

3. Whip the cream to soft peaks.

Step 17

4. Gently mix the warm milk mixture with the whipped cream.

Step 18

5. Add the pistachio paste and green dye, folding gently to combine.

Step 19

**Strawberry Jelly**

Step 20

1. Heat the strawberry puree with sugar until the sugar fully dissolves.

Step 21

2. Add the swollen gelatin and mix well.

Step 22

3. Pour the mixture into two 16cm (6.3 inch) rings, and freeze until set.

Step 23

**Frosting**

Step 24

1. Whip the butter and powdered sugar until fluffy.

Step 25

2. Add the cream cheese and continue to whip until smooth and creamy.

Step 26

**Assemble the Cake**

Step 27

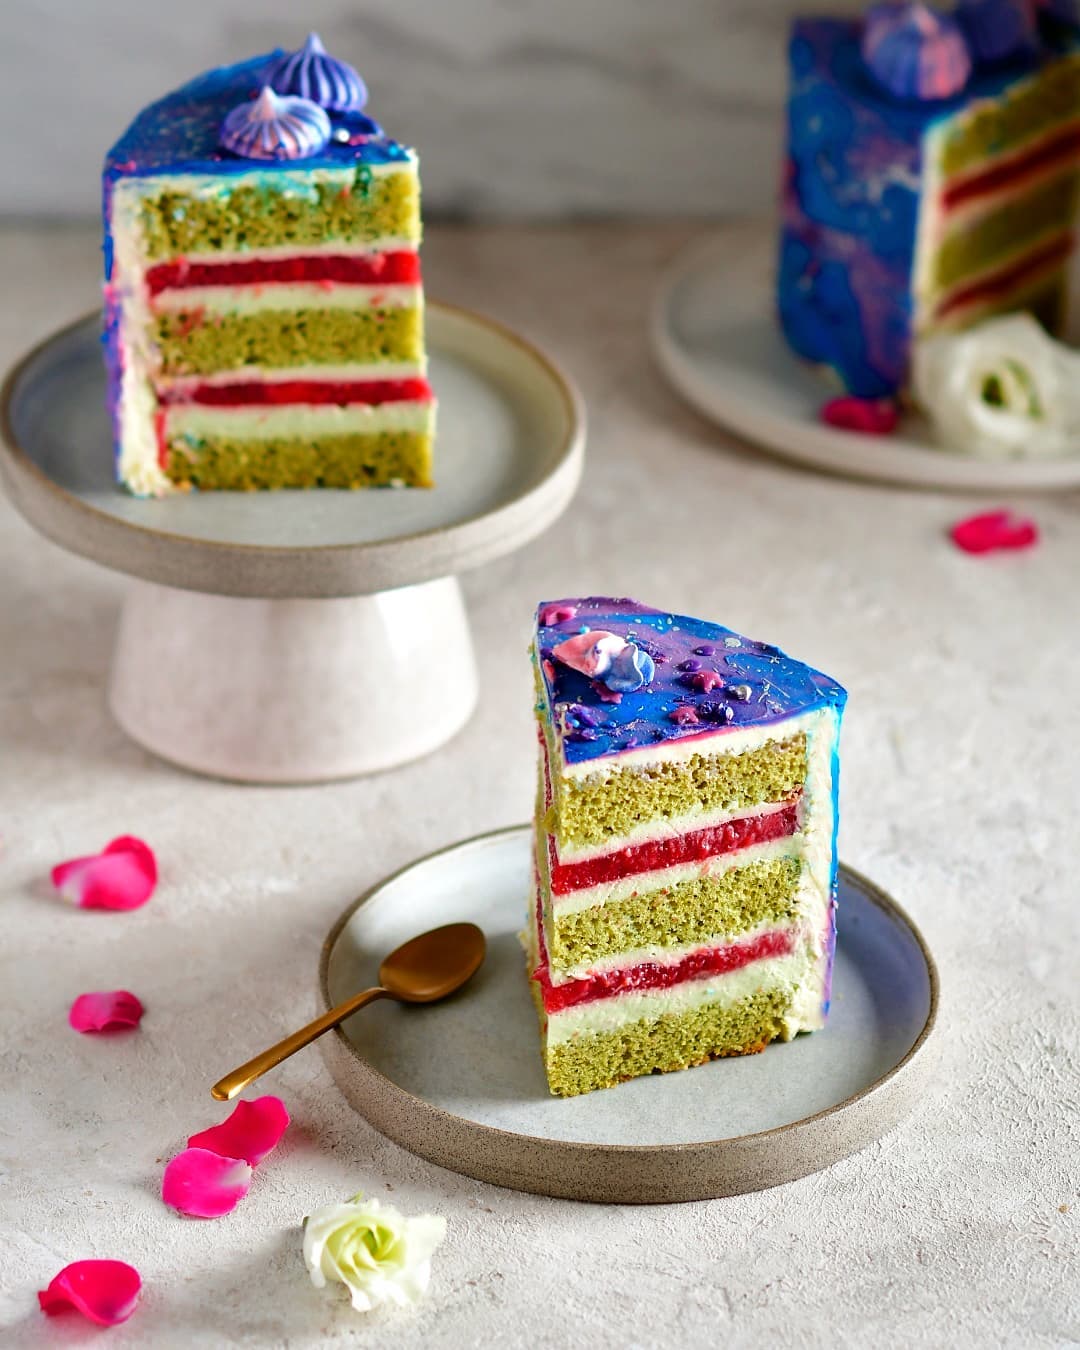
1. Assemble the cake in an 18cm ring lined with acetate film.

Step 28

2. Place the first pistachio cake layer at the bottom.

Step 29

3. Spread a layer of pistachio mousse over the cake layer.

Step 30

4. Add a layer of frozen strawberry jelly.

Step 31

5. Repeat with another layer of mousse and strawberry jelly.

Step 32

6. Top with the final pistachio cake layer.

Step 33

7. Refrigerate the assembled cake to stabilize overnight.

Step 34

8. Apply a rough layer of frosting and chill the cake well.

Step 35

9. Finally, cover with the top coat of frosting.

Servings

Serving this Pistachio Strawberry Layered Cake is a delight for both the eyes and the taste buds. If you’re preparing for a special event, arrange fresh strawberries and sprinklings of finely chopped pistachios around the base of the cake for an elegant touch. 🍓 For a cozy family gathering, serve each slice with a dollop of whipped cream and a drizzle of strawberry sauce to make each bite absolutely heavenly. 🍰 If you're feeling extra adventurous, pair individual slices with a glass of chilled Moscato or a cup of hot, aromatic green tea to accentuate the delicate flavors of pistachio and strawberry. Your guests won't stop talking about your creation! 🎉✨

Variations

For a **gluten-free version**, you can substitute the flour with an equivalent measure of gluten-free baking flour. Make sure your baking powder is labeled gluten-free as well! 🥳 If you're looking to make this cake **vegan**, swap the heavy cream with coconut cream and use plant-based milk. Opt for a vegan gelatin substitute like agar agar, and use vegan butter and vegan white chocolate. Replace the eggs with a combination of applesauce or flaxseed meal (1 tablespoon flaxseed meal + 2.5 tablespoons water = 1 egg). 🌱💚

Faq

  • What can I use if I don’t have a baking ring or mold?

    You can use an 8-inch springform pan as an alternative. Line it with parchment paper for easy removal.

  • How do I know if my cake is fully baked?

    Insert a dry skewer into the center of the cake. If it comes out clean or with a few dry crumbs, your cake is done.

  • Can I make the components in advance?

    Absolutely! You can make the pistachio sponge and strawberry jelly a day before and assemble everything on the day you intend to serve the cake.

  • What’s the best way to store this cake?

    Store the assembled cake in the refrigerator, well-covered, to maintain its freshness. It should be consumed within 3-4 days.

  • How can I stabilize the mousse if it's too runny?

    Ensure your heavy cream is whipped to soft peaks before folding it in. If needed, you can add a bit more dissolved gelatin to stabilize it better.

  • Why is my frosting runny?

    Your cream cheese and butter might have been too warm. Chill them slightly before whipping together to achieve a stiffer frosting.

Nutrition facts

Pistachio & strawberry mousse cake
Recipe Yield:1 cake
Calories:Per serving, assuming the cake is divided into 12 portions.
Calories (Min - Max):350 - 400
Total Fat:25g
Saturated Fat:15g
Protein:6g
Total Carbohydrate:28g
Total Sugars:20g