Ingredients

Marshmallow

  • 30 grams (1.05 ounces) gelatin
  • 120 grams (4.25 ounces) water (for soaking)
  • 400 grams (14.10 ounces) sugar
  • 100 grams (3.55 ounces) water
  • 160 grams (5.65 ounces) trimoline or invert liquid sugar

Equipment

  • Kitchen Scale

    Accurate measurements are crucial in baking, so a kitchen scale ensures you get the exact amount of each ingredient.

  • Saucepan

    You'll need this to heat up your syrup mixture. Opt for one with a heavy bottom to distribute heat evenly and prevent burning.

  • Thermometer

    Monitoring the temperature of your syrup is essential. A digital thermometer gives you a precise reading.

  • Stand Mixer

    This tool will save your arm muscles! It's perfect for achieving the fluffy, whipped texture of marshmallows.

  • Mold/Baking Sheet

    A mold or baking sheet covered in cling film will help shape your marshmallows. Grease lightly with vegetable oil for easy removal.

  • Spatula

    A silicone spatula is ideal for leveling the marshmallow layers and can also help in folding in colors or decorations.

Instructions

Step 1

1. Soak 30 grams (1.05 ounces) of gelatin with 120 grams (4.25 ounces) of water. Leave it for 15 minutes to swell. You can use cold water to help the gelatin bloom evenly.

Step 2

2. In a saucepan, combine 400 grams (14.10 ounces) sugar, 100 grams (3.55 ounces) water, and 160 grams (5.65 ounces) trimoline or invert syrup. Heat over medium until boiling. Let it boil for 20-30 seconds. The syrup should reach approximately 110-115°C (210-230°F). Use a candy thermometer for precise temperature measurement.

Step 3

3. While the syrup is heating, melt the gelatin in a water bath until completely dissolved. Do not let the gelatin overheat; it should just be warm enough to dissolve.

Step 4

4. Pour the boiling syrup into the bowl with the melted gelatin. Whip on medium speed until a dense white mass forms and the mixture has increased in volume. The whipping time will depend on the amount of mass and the power of your mixer. The mixture should look fluffy and white when ready.

Step 5

5. Prepare a mold or baking sheet. Cover it with cling film and lightly grease with vegetable oil. Ensure an even layer of oil to prevent sticking.

Step 6

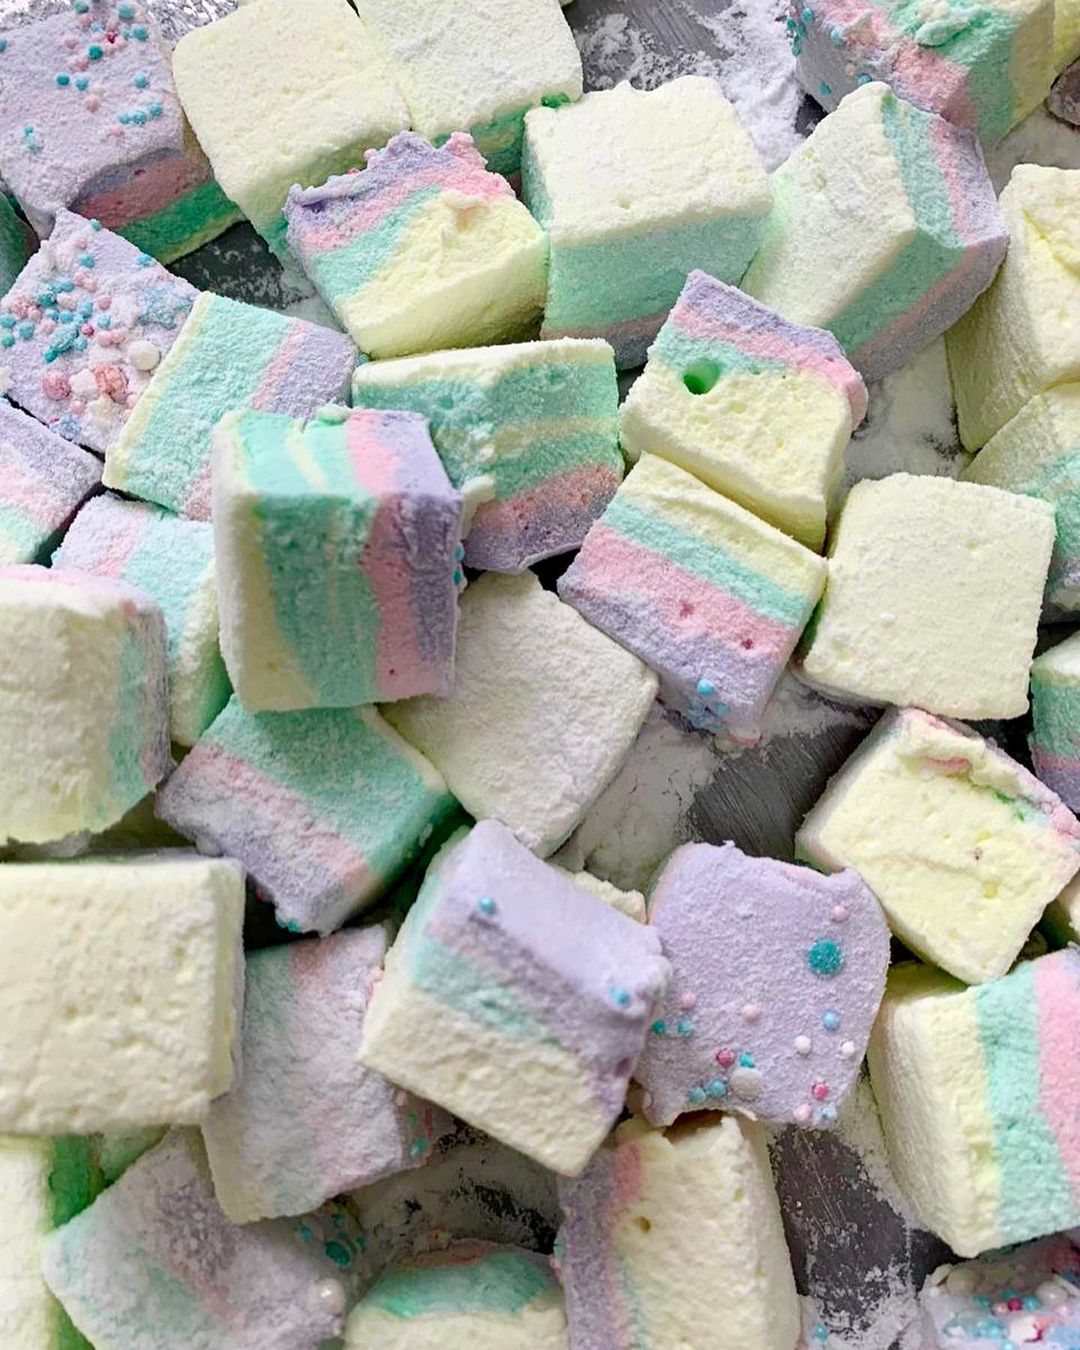
6. Add food dye in 3-4 colors to the marshmallow mixture and create layers, leveling them with a spatula. Even if your colors vary in volume, the final product will still look spectacular.

Step 7

7. If desired, decorate the marshmallows with sprinkles, freeze-dried berries, or other decorative elements. Press the decorations gently into the surface so they adhere well.

Step 8

8. Leave the mold at room temperature for 6-7 hours until the marshmallow sets. Cover the mold lightly with a cloth to keep dust out while allowing air circulation.

Step 9

9. Once set, remove the marshmallow from the mold. Roll it in a mixture of powdered sugar and starch (1:1), and cut into cubes (3x3 cm). A sharp knife dusted with powdered sugar will make cutting easier and cleaner.

Step 10

10. Store the marshmallows in closed, sealed containers for up to 14 days. They can stay fresh longer if kept in a cool, dry place.

Servings

Picture this: a cozy evening, a cup of hot cocoa, and your freshly made marshmallows melting blissfully on top. 🥰 These homemade marshmallows are not just the perfect addition to your hot drinks, but they’re also amazing on their own or as a delightful topping for desserts. For a classic touch, serve them with a pot of gourmet hot chocolate. The marshmallows will add a creamy, sweet layer that makes every sip heavenly. Want to jazz things up a bit? Try dipping your marshmallows in melted chocolate and adding a sprinkle of crushed nuts or coconut flakes. Talk about next-level treats! 🍫✨ These marshmallows are also fantastic for s'mores. Layer them between graham crackers and chocolate pieces, then toast them up for an ooey-gooey sensation. Or, incorporate them into a dessert board; combine with fruits, nuts, and mini cupcakes for a spread that is sure to impress your guests! 🎉🍓

Variations

Want to make this recipe gluten-free? Great news, it's naturally gluten-free! Just be sure to double-check that your ingredients are certified gluten-free to avoid any cross-contamination. 🌾🚫

For our vegan friends, you can swap out the gelatin for agar-agar. Use 10g of agar-agar and pre-soak it in 120g of water, just as you would with gelatin. Instead of the trimoline or invert sugar, use a plant-based syrup like agave or maple syrup. 🥥🌿🌟

Faq

  • Do I really need a kitchen scale?

    Yes, precise measurements are crucial in baking, and a kitchen scale ensures you get the exact amount of each ingredient.

  • Can I use a hand mixer instead of a stand mixer?

    You can, but it may take longer and require more effort to achieve the same fluffy texture.

  • Why did my marshmallows turn out too sticky?

    The syrup may not have been boiled to the right temperature. Use a thermometer to ensure it's between 110-115°C (210-230°F).

  • How can I add different flavors to my marshmallows?

    You can add different extracts like vanilla, peppermint, or almond during the mixing process. Just a few drops will do the trick.

  • What's the best way to store homemade marshmallows?

    Store them in an airtight container at room temperature. They can last up to 14 days if stored properly.

  • Can I freeze these marshmallows?

    Yes, you can freeze them for up to 3 months. Just make sure they are stored in an airtight container or freezer bag to prevent freezer burn.
Nutrition facts

Rainbow marshmallow
Recipe Yield:Approximately 50 cubes
Calories:15-20 per cube
Calories (Min - Max):15 - 20
Total Fat:0g
Saturated Fat:0g
Protein:0g
Total Carbohydrate:4g
Total Sugars:4g