Ingredients

Sponge biscuit

100 grams (3.5 ounces) flour
6 grams (0.21 ounces) baking powder
130 grams (4.6 ounces) sugar
15 grams (0.53 ounces) cocoa
4 large eggs
35 grams (1.2 ounces) vegetable oil
1 teaspoon (5 milliliters) milk
pinch of salt

Meringue

110 grams (3.9 ounces) egg whites
300 grams (10.6 ounces) sugar
70 grams (2.5 ounces) water
15 grams (0.53 ounces) baking powder

Cream

300 grams (10.6 ounces) butter
340 grams (12 ounces) caramel spread
170 grams (6 ounces) sweetened condensed milk
25 grams (0.88 ounces) cocoa
0.25 teaspoon (1.25 milliliters) vanilla paste
170 grams (6 ounces) walnuts

Soaking

3 tablespoons (45 milliliters) Bailey's Irish cream liquor or coffee syrup

Instructions

Step 1

Sponge Biscuit: The calculation is for a 20cm ring mold. Ensure the eggs are at room temperature. Slightly heat the oil until warm, then add cocoa, mix, add milk and a pinch of salt.

Step 2

Ensuring the oil is not too hot will help in blending all ingredients smoothly.

Step 3

Sift flour with baking powder. Separate the eggs into whites and yolks. Beat the whites, gradually adding half of the sugar (65 g / 2.30 oz), until peaks form. Then beat the yolks with the remaining sugar until the volume increases 4-5 times.

Step 4

Be cautious not to overbeat the whites as it might break them.

Step 5

Add the mixture of cocoa and vegetable oil to the yolks, mix well with a spatula. Gently fold in the egg whites in portions. Finally, incorporate the sifted flour with baking powder in portions. Mix well.

Step 6

Folding in the whites gently ensures your cake will be light and airy.

Step 7

Bake at 170-175°C (340-355°F) for 35-40 minutes. Check readiness with a toothpick; it should come out clean and dry. Allow the sponge cake to cool in the oven.

Step 8

Cooling the cake in the oven helps prevent it from sinking in the middle.

Step 9

Remove the completely cooled sponge cake from the mold, wrap it in cling film or a plastic food bag, and let it 'ripen' for 2-3 hours.

Step 10

Meringue: Egg whites should be at room temperature. Mix sugar and water in a saucepan, put on the stove over low heat. The sugar syrup should be boiled until the temperature reaches 120°C (250°F) (use a kitchen thermometer to measure the temperature).

Step 11

Keep an eye on the syrup temperature closely to prevent it from burning.

Step 12

When the syrup reaches 106°C (220°F), begin whipping the egg whites at low speed, gradually increasing speed as the temperature rises. Continue to beat at maximum speed and slowly pour in the sugar syrup without letting the syrup touch the whisk. Whisk until the meringue cools down to 43-40°C (105-110°F). Add confectioner's sugar and whisk again until combined. Form meringue shapes on baking paper using a pastry bag, optionally with a decorative piping tip.

Step 13

Ensure your equipment is grease-free to achieve stiff peaks in your meringue.

Step 14

Bake at 75°C (165°F) in convection mode for 2 hours.

Step 15

Cream: I make two types of cream. For the first, whip 200g (7.05 oz) of butter at room temperature for 2-3 minutes at maximum speed until it increases in volume. Gradually add the caramel spread and cocoa, whipping until combined and increased in volume.

Step 16

Using room temperature butter ensures it's easier to work with and blends smoothly.

Step 17

For the second cream, whip 100g (3.55 oz) of butter at room temperature for 2-3 minutes at maximum speed until it increases in volume. Add chilled condensed milk and vanilla paste in portions. The nuts should be coarsely chopped.

Step 18

Chilling the condensed milk helps in thickening the cream better.

Step 19

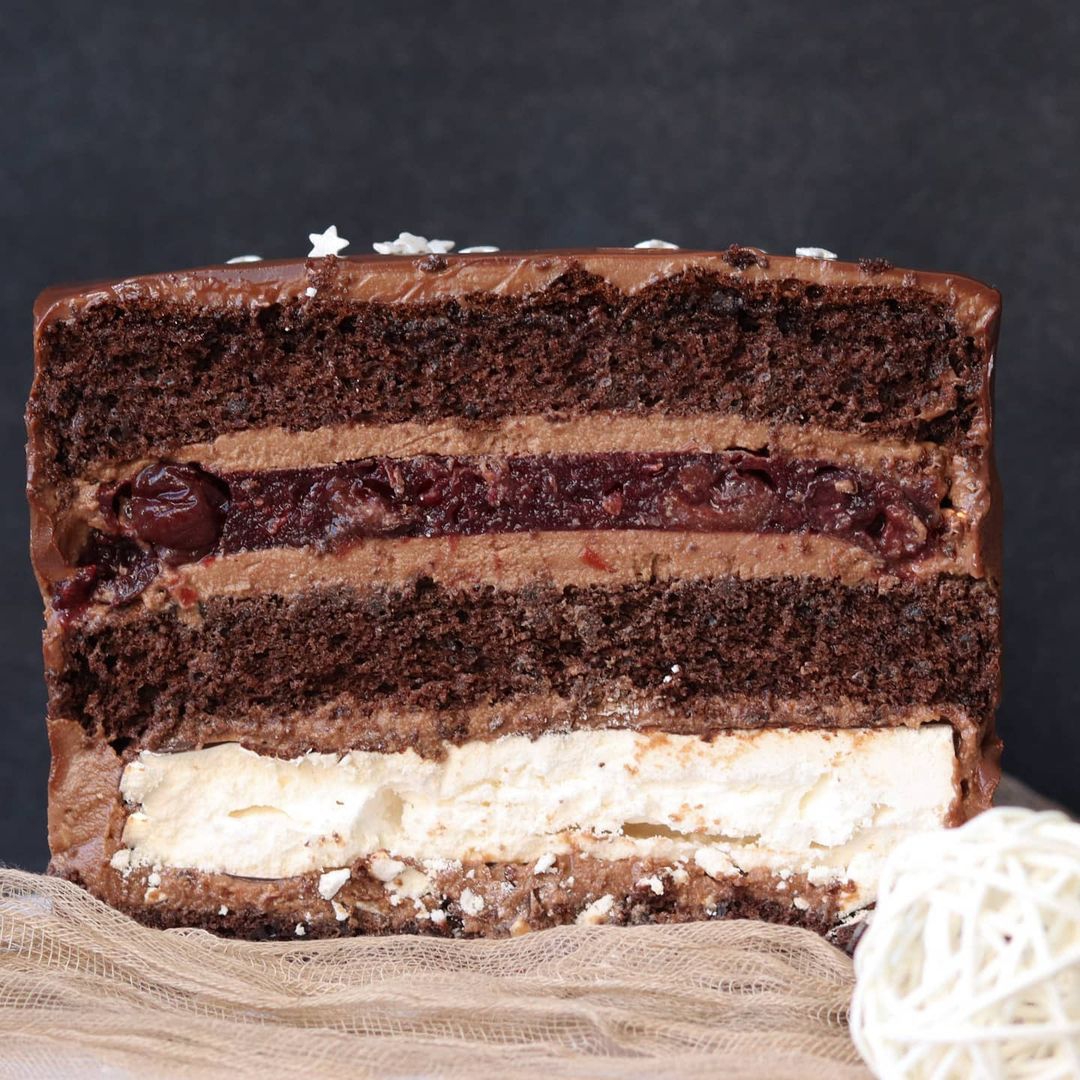
Divide the sponge biscuit into 2 cake layers. Soak the cake layers with Bailey's or coffee syrup if preferred. Spread 200g (7.05 oz) of the first cream (with caramel spread) on the first cake layer, sprinkle 80g (2.80 oz) of nuts, and spread 80g (7.05 oz) of the second cream (with sweetened condensed milk) on the sides.

Step 20

Ensure an even layer for a balanced taste in every bite.

Step 21

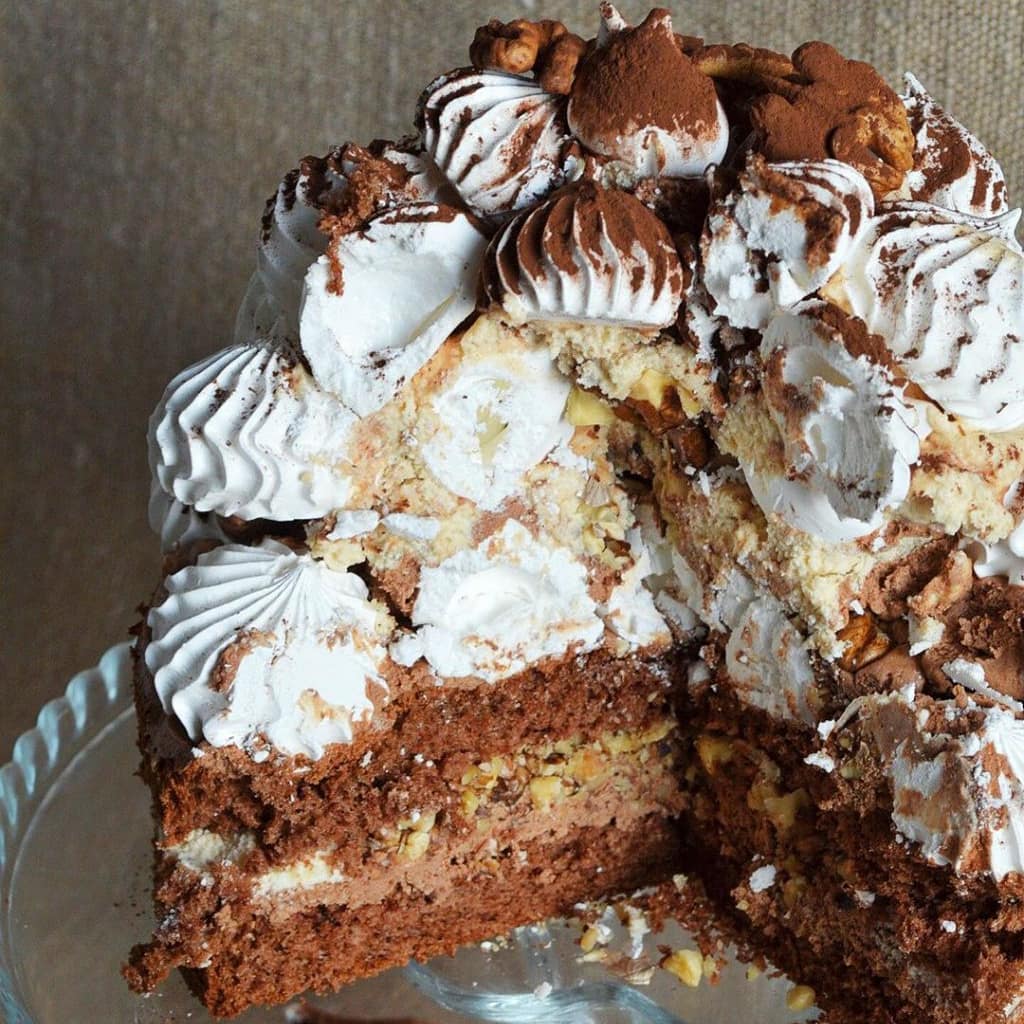
Cover with the second cake layer, soak if needed. Apply a thin layer of cream, followed by meringue, more cream, nuts, and build up the layers, forming a 'heap'. Decorate the cake with nuts and chocolate threads if desired. Refrigerate for 12 hours.

Servings


Buckle up and get ready for a swoon-worthy experience with your homemade pastries. 🌟

For a touch of elegance, plate each slice on fine china and add a light dusting of powdered sugar or cocoa on top. Placing a fresh mint leaf or a single raspberry on the side of the plate wouldn’t hurt either. 🍃✨

Hosting a party? Set up a **DIY pastry bar** where guests can add their choice of toppings like whipped cream, fruit compotes, and shaved chocolate—creating their mini masterpieces! 🥳🍓🧁

If you’re cozying up with a loved one, pair your pastries with a warm beverage. A rich Baileys-infused coffee or a frothy almond latte would perfectly complement the different layers and textures of your creation. Don't forget the snuggly blanket! ☕💖📺

These pastries also make fabulous gifts. Wrap them in clear plastic and tie with a decorative ribbon for a thoughtful, homemade present that beats anything store-bought. 🎁💝

Feeling adventurous? Dress up your pastries with an artistic chocolate drizzle or a splash of edible gold dust for that Instagram-worthy shot! 📸✨

Equipment

20 cm Ring Mold

Essential for creating perfectly shaped cakes. Make sure to grease or line with parchment paper to prevent sticking.

Kitchen Thermometer

Crucial for ensuring your sugar syrup reaches the right temperatures for meringue.

Electric Mixer

Save time and get perfect consistency by using a stand or hand mixer for your creams and meringue.

Piping Bag and Curly Piping Tip

Ideal for giving your meringue a professional finish. Remember to squeeze evenly for consistent shapes.

Convection Oven

This helps in getting that perfect bake on your meringues. Regular ovens can work but keep a close eye on the baking time.

Variations


For those *dietary-conscious* friends: 🌱

Gluten-Free Version: Swap out the flour with a gluten-free all-purpose flour blend. Ensure your baking powder is certified gluten-free as well. Easy peasy!

Vegan Version:
  • Replace **eggs** with an egg substitute like flaxseed or chia seeds mixed with water.
  • Use a **vegan butter** option and **plant-based milk** instead of traditional dairy products.
  • Opt for **coconut sugar** or another plant-based sweetener in place of regular sugar.
And, voila! Your plant-based friends can now enjoy this mouth-watering treat too. 🥳💚

Remember, nutritious diets don't mean flavor sacrifices. You got this!

Faq

  • Why are my egg whites not whipping to stiff peaks?

    Ensure there are no traces of yolk and your equipment is grease-free. Whites whip best at room temperature!

  • What do I do if my meringue is too runny?

    This could be due to under-whipping or adding the sugar syrup too quickly. Gradual addition and consistent whipping are key.

  • Can I make this recipe without a kitchen thermometer?

    While it's challenging, you can estimate by keeping an eye on the consistency of the syrup. However, a thermometer is recommended.

  • What if my sponge biscuit sinks in the middle?

    This might happen if you've opened the oven door too early or whipped the egg whites excessively. Try again and keep these points in mind.

  • Is there an alternative to piping bags for meringue?

    Yes, you can use a plastic zip-top bag with a corner cut off or simply spoon the meringue into shapes.

  • How can I make my pastries presentable for Instagram?

    Use natural lighting, clean backgrounds, and add garnishes like fresh fruit or a dusting of powdered sugar to make them pop!

Nutrition facts

Ruins of a count's castle
Recipe Yield:10 servings
Calories:per slice
Calories (Min - Max):500 - 550
Total Fat:30g
Saturated Fat:15g
Protein:7g
Total Carbohydrate:55g
Total Sugars:40g