Ingredients
The pastry
The cream
Instructions
Step 1
Preheat your oven to 374°F (190°C). This ensures the oven is hot enough when the cake layers are ready to be baked.Don't forget to preheat - it makes your baking more consistent!
Step 2
In a large bowl, whip the eggs with the sugar until the mixture is pale and fluffy.Use a hand mixer or stand mixer for best results.
Step 3
Add the baking soda slaked with lemon juice or vinegar to the egg mixture. Gradually add the sour cream and sifted flour, mixing well after each addition. Divide the mixture into two equal parts.Mix just until combined to avoid overworking the flour.
Step 4
Add the cocoa powder to one half of the batter and mix until well combined.Ensure no lumps of cocoa for an even chocolate flavor.
Step 5
Pour each batter half into a separate cake ring or pan. Bake in the preheated oven for 30 minutes or until a toothpick inserted into the center comes out clean. Allow the cake layers to cool completely.Don't open the oven door early; it can cause the cakes to sink.
Step 6
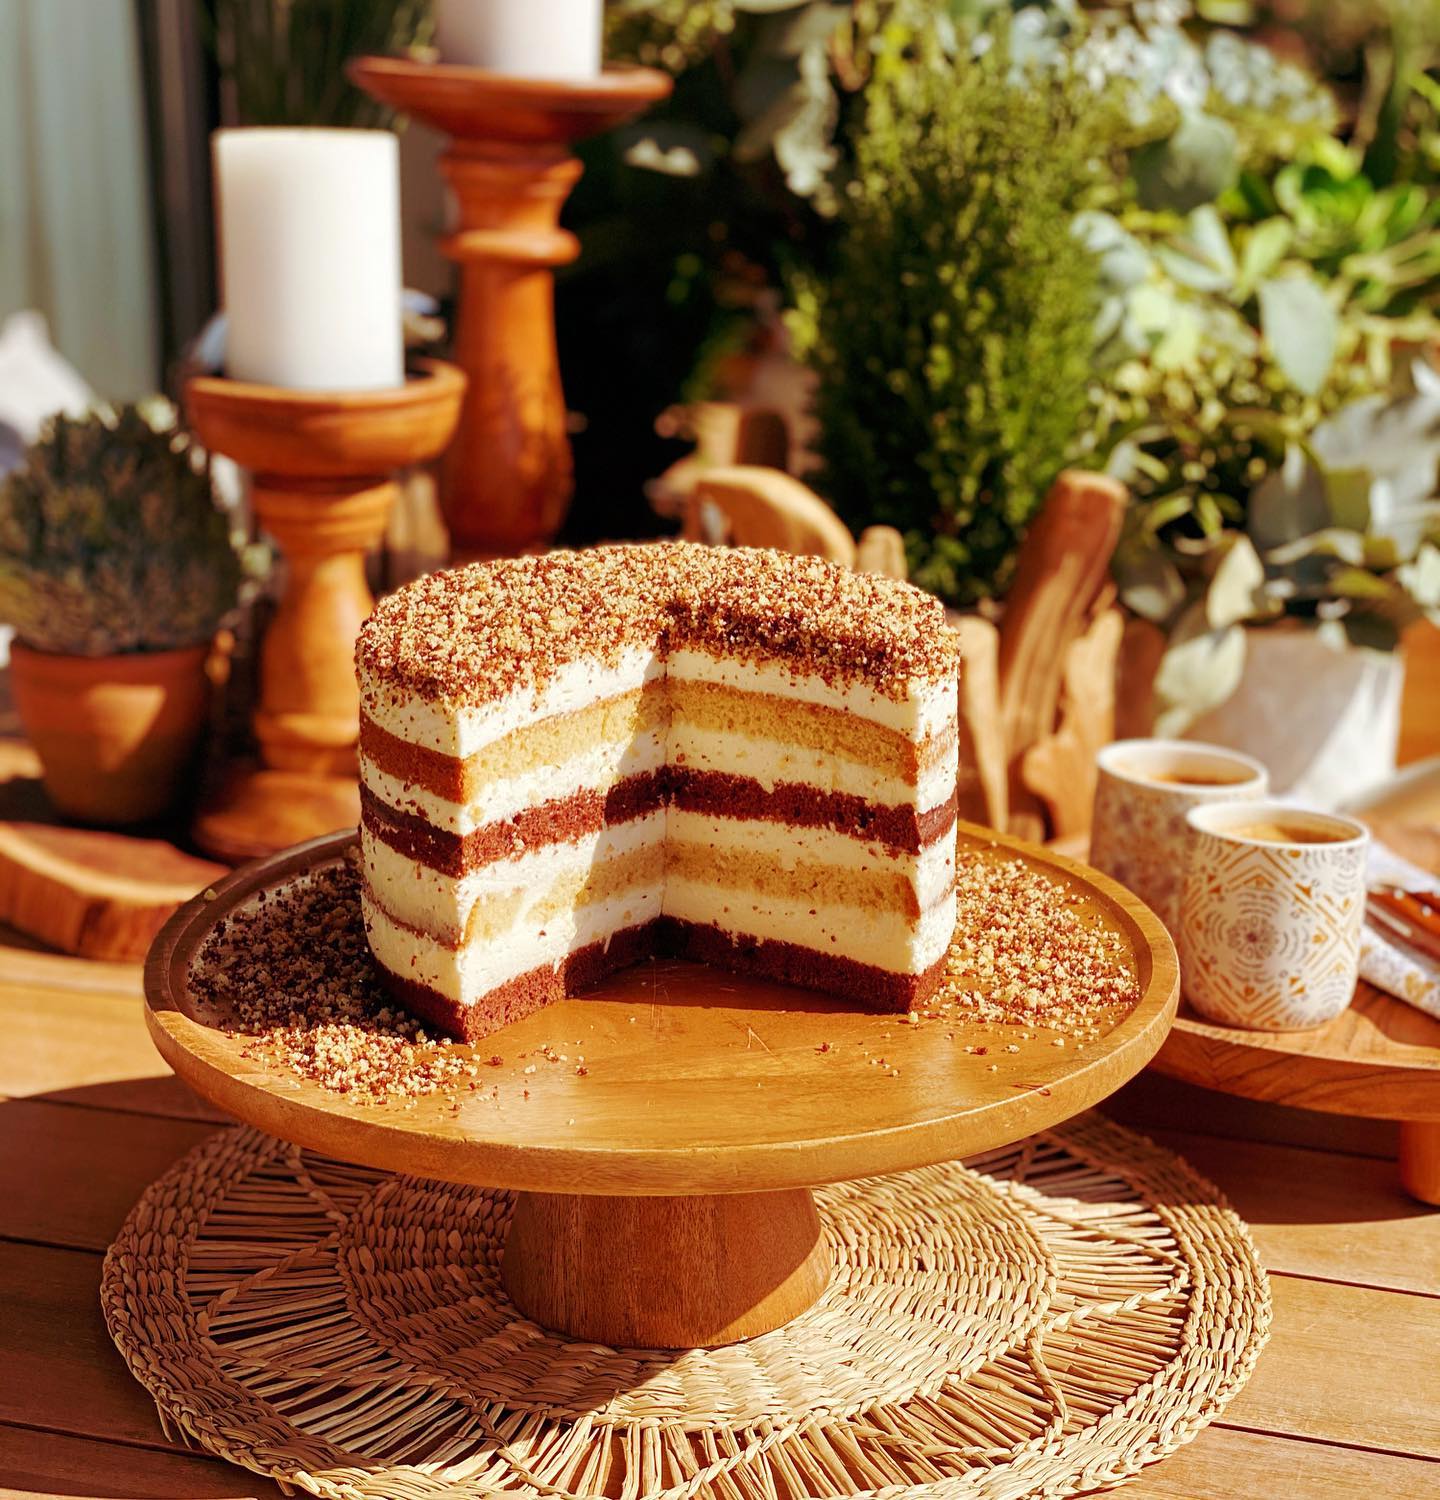
Once cooled, cut off the tops of the cake layers to create a flat surface, then cut each layer in half horizontally. Use the tops for biscuit crumbs later.Use a serrated knife for the best cuts.
Step 7
Soak the gelatin in water (ratio 1:6). Melt it slowly and allow it to cool, being careful not to let it harden.Melt the gelatin over low heat to avoid clumping.
Step 8
Pour the cooled gelatin into the sour cream, and whip together with the sugar and vanillin until fluffy.Chill your mixing bowl for better whipping results.
Step 9
Spread the cream generously over each cake layer and stack them. Cover the entire cake with a thin layer of cream.Apply cream evenly to avoid the cake tilting.
Step 10
Sprinkle the top and sides of the cake with the cake crumbs prepared earlier. Chill the cake for at least a couple of hours before serving.Chilling helps the flavors blend and makes slicing easier.
Servings
✨ This delightful cake is a showstopper on its own, but the fun doesn't stop there! Here are some serving suggestions to elevate your cake experience:
Dress it up with fresh berries: Add a pop of color and a burst of freshness by garnishing your cake with an assortment of fresh berries like raspberries, strawberries, and blueberries. 🍓
Add a touch of decadence with chocolate drizzle: Melt some dark chocolate and drizzle it over the top of your cake for an extra layer of indulgence. 🍫
Serve with a side of ice cream: For a classic pairing, serve a slice of this cake with a scoop of vanilla ice cream. The contrast of warm cake and cold ice cream is pure bliss! 🍨
Create a dessert buffet: Include this cake as part of a larger dessert buffet, complementing it with mini pastries, cookies, and other sweet delights. It's perfect for parties and gatherings! 🎉
Equipment
Having multiple mixing bowls can save you time and keep your ingredients organized. Go for stainless steel or glass for durability and easy cleaning.
A good whisk is essential for combining ingredients smoothly. Opt for a balloon whisk for maximum efficiency.
Invest in 18cm (7.09 inch) baking rings for perfectly shaped cake layers. Non-stick options will make your life easier.
Precision is key in baking, so ensure you have a complete set for accurate measurements.
A reliable oven that can maintain a steady temperature is crucial. Preheat it to 374F (190C) for this recipe.
Variations
Thinking of adapting this recipe to fit a gluten-free or vegan lifestyle? We've got you covered!
Gluten-Free Variation 🌾: Replace the all-purpose flour with a gluten-free flour blend. Ensure that your baking soda and other ingredients are certified gluten-free to avoid any contamination.
Vegan Variation 🌱: Swap the eggs with flax eggs (1 tablespoon of ground flaxseed mixed with 3 tablespoons of water per egg). Use a dairy-free sour cream alternative, and make sure your sugar is vegan-friendly.
Faq
- How do I know if my cake is done baking?
Insert a toothpick into the center of the cake. If it comes out clean or with a few crumbs, your cake is done!
- Why did my cake come out dense?
Overmixing the batter can lead to a dense cake. Make sure to mix just until the ingredients are combined and no more.
- Can I substitute the sugar in the recipe?
Yes, you can use alternative sweeteners like honey, maple syrup, or agave nectar, but this may affect the consistency and baking time.
- How can I make the cake layers more moist?
Brush the layers with a simple syrup or milk before adding the cream. This will add extra moisture and flavor.
- Can I prepare the cake layers in advance?
Absolutely! Bake the layers, cool them completely, and wrap them in plastic wrap. Store them in the refrigerator for up to 3 days or freeze up to 1 month.
- How can I prevent my cake from sticking to the baking rings?
Ensure you grease the baking rings well with butter or a non-stick spray and consider lining the bottom with parchment paper for easy removal.


