Ingredients
Cake Layers
Filling
Chocolate Ganache
Frosting
Chocolate Glaze
Instructions
Step 1
Combine the honey, sugar, and butter in a saucepan, preferably one with a double bottom, and place it on low heat. Stir frequently to prevent burning. In a separate bowl, combine the sour cream and baking soda, and set it aside.
Step 2
Increase the heat to medium and cook the mixture until the sugar dissolves completely, stirring constantly. Keep an eye on the mixture to avoid caramelization.
Step 3
Combine the sour cream and baking soda mixture with the honey mixture and mix thoroughly. Remove the pan from the heat. The mixture should become very foamy and increase in volume.
Step 4
Sieve the flour and cocoa powder together, then add a pinch of salt and mix. Sieving helps to remove lumps and ensure an even texture.
Step 5
Pour the honey mixture into a mixer bowl. Beat on medium speed, adding the eggs one by one. Gradually add the dry ingredients and mix until smooth.
Step 6
Line a baking tray with seven sheets of high-quality baking paper. Make sure no spaces are uncovered. Ensure the paper is long enough to cover the entire surface.
Step 7
Wrap the cake in acetate wrap, place it into a springform pan, and chill in the fridge for at least a couple of hours, preferably overnight.
Step 8
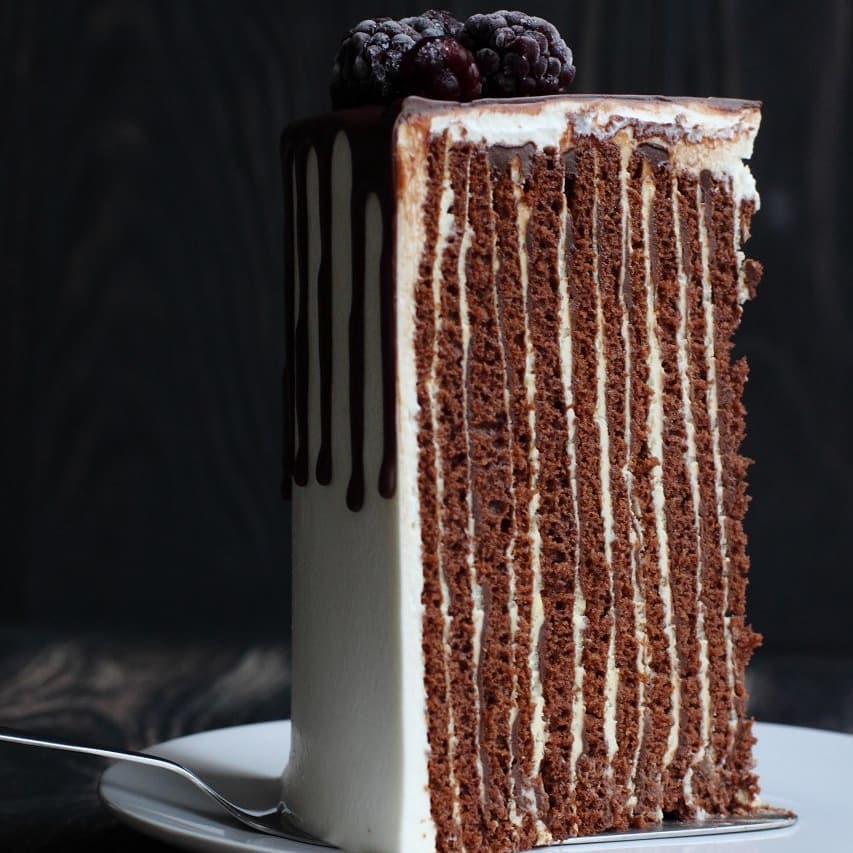
Melt the chocolate and butter in a hot water bath or microwave, then mix thoroughly with a spatula. Add one tablespoon of oil and mix until combined. If the glaze is not runny enough, add another tablespoon of oil and mix again. Transfer the glaze to a disposable piping bag and let it cool to room temperature.
Step 9
Remove the cake from the fridge and place it on a turntable. Cut a small opening at the tip of the piping bag (0.2-0.3 cm). Slowly turn the turntable and drizzle the chocolate glaze over the edges of the cake. For varied drizzles, make every third or fourth drizzle longer.
Step 10
Top the cake with a sprig of fresh or frozen berries or other decorations of choice. Consider using edible flowers or nuts for added flair.
Servings
Looking for ways to make the most out of your delightful chocolate pastry? Start by serving slices with a scoop of vanilla ice cream on the side for an extra touch of indulgence.
For a fresh take, garnish with a handful of mixed berries – their natural sweetness perfectly complements the rich chocolate. 🍓
If hosting a party, try serving it in elegant individual portions using small, round molds. This creates a stunning presentation that will wow your guests. 🎉
Pair your chocolate pastry with a cup of freshly brewed espresso for a sophisticated treat. The coffee’s bold flavor will enhance the depth of the chocolate.
For a cozy twist, enjoy it with a glass of warm milk or a hot cocoa. Perfect for those chilly evenings when you need a comforting dessert. ☕🍫
Equipment
Ensures even heat distribution, preventing your delicate mixture from burning. If you don't have one, a heavy-bottom pot will work too.
Perfect for achieving smooth batter and whipped cream. A hand mixer can be used as an alternative, but it will require more effort.
High-quality, non-stick baking paper will make removing your cake layers a breeze. Be sure to line your tray well!
Great for shaping and chilling your cake layers. It allows for easy removal without damaging the cake.
Ideal for applying the chocolate glaze smoothly and with precision. You can use a ziplock bag with a small corner cut if needed.
Variations
Gluten-Free 🌾❌: Swap the all-purpose flour for a high-quality gluten-free flour blend. Make sure to check other ingredients to ensure they're also gluten-free.
Vegan 🌱💚: Replace the butter with vegan butter, use a plant-based cream for the filling and frosting, and substitute the eggs with flax or chia seeds mixed with water. The honey can be replaced with maple syrup or agave syrup.
Creating these variations ensures that everyone, regardless of dietary restrictions, can enjoy this delicious dessert.
Faq
- Why did my mixture become too foamy and overflow?
If the mixture is becoming too foamy, reduce the heat slightly and make sure you’re stirring constantly to keep it under control.
- Can I use a hand whisk instead of a stand mixer?
Yes, but it will require more effort and time to achieve a smooth batter and well-whipped cream.
- What should I do if my glaze is too thick?
Add a bit more refined vegetable oil to achieve the desired consistency. Mix well to ensure it's fully combined.
- How can I prevent the cake layers from sticking to the baking paper?
Ensure you use high-quality non-stick baking paper and line the tray thoroughly, covering all spaces.
- Can I make the cake layers ahead of time?
Absolutely! You can bake the layers and store them in an airtight container for up to 2 days before assembling.
- What’s the best way to store the completed pastry?
Store the assembled pastry in the refrigerator. It's best enjoyed within 2-3 days for optimal freshness.

