Ingredients

Dacquoise Sponge Biscuit

  • 230 grams (8.11 ounces) egg whites
  • 165 grams (5.82 ounces) sugar
  • 10 grams (0.35 ounces) vanilla sugar
  • 150 grams (5.29 ounces) almond crumbs
  • 40 grams (1.41 ounces) cornstarch
  • 4 grams (0.14 ounces) alkalized cocoa
  • 1 gram (0.035 ounces) salt
  • 30 grams (1.06 ounces) almond flakes, for sprinkling

Coffee Custard

  • 110 grams (3.88 ounces) egg yolks
  • 120 grams (4.23 ounces) sugar
  • 5 grams (0.18 ounces) vanilla sugar
  • 560 grams (19.75 ounces) milk
  • 48 grams (1.69 ounces) cornstarch
  • 32 grams (1.13 ounces) espresso
  • 160 grams (5.64 ounces) butter, 82.5%
  • 5 grams (0.18 ounces) rum

Chocolate Cream

  • 200 grams (7.05 ounces) coffee custard
  • 100 grams (3.53 ounces) bitter chocolate
  • 100 grams (3.53 ounces) butter, 82.5%
  • 30 grams (1.06 ounces) powdered sugar

Mascarpone Cream

  • 80 grams (2.82 ounces) cream, 35%
  • 125 grams (4.41 ounces) mascarpone
  • 25 grams (0.88 ounces) powdered sugar
  • 0.5 vanilla pod
  • Alkalized cocoa for sprinkling

Equipment

  • Electric Mixer

    Essential for whipping your egg whites and creams to perfect peaks. Make sure the bowl and whisk are clean and dry for the best results.

  • Baking Paper

    Pre-cut sheets make it easier to handle and keep your baking uniform. Don’t forget to lightly grease the paper to ensure easy removal of the cake layers.

  • Spatula

    A must for folding your ingredients gently and preventing deflation of your whipped egg whites.

  • Acetate Cake Collar

    Helps maintain the shape and provides a professional finish to your cake. They can be reused—just wash and dry carefully.

  • Piping Bag with 1cm Round Tip

    Perfect for achieving that beautiful mascarpone topping. Practice a bit on a plate before going directly to the cake.

Instructions

Step 1

Preheat your oven to 356F (180C).Ensuring the oven is properly preheated will help achieve a consistent bake for all cake layers.

Step 2

Whip the egg whites at room temperature with sugars and salt until stiff peaks form.Using room temperature egg whites ensures better volume when whipped.

Step 3

Mix the almond crumbs, cocoa, and cornstarch together with a whisk.

Step 4

Gently fold the dry mixture into the whipped egg whites using a spatula.Be gentle to keep the airiness of the egg whites intact.

Step 5

Divide the batter into five equal parts. Form five cake layers on parchment paper, each with a diameter of 17cm (6.7 inches).

Step 6

Sprinkle each layer with almond flakes.

Step 7

Bake the cake layers for about 20 minutes, until they are crispy on top.

Step 8

Let the biscuit layers cool, then carefully remove the parchment paper.

Step 9

Warm the egg yolks, sugar, and cornstarch into a homogeneous paste.

Step 10

Heat the milk until just boiling. Gradually add a small amount of hot milk to the yolk mixture while constantly stirring.Tempering the yolks prevents them from curdling.

Step 11

Pour the yolk mixture back into the remaining milk and cook over medium heat, stirring continuously, until the mixture thickens.

Step 12

Once thickened, add the hot espresso and rum, stirring constantly until fully incorporated.

Step 13

Cover the custard with plastic wrap, ensuring the wrap touches the surface to prevent a skin from forming, and let it cool completely.

Step 14

In a separate bowl, whip the butter until white and fluffy, then set 200 grams (7.05 ounces) aside for the chocolate cream.Using room temperature butter will make the whipping process easier.

Step 15

Incorporate the rest of the cooled custard into the whipped butter.

Step 16

Prepare a split ring mold by lining it with a 12cm (4.72 inch) wide acetate tape and placing it on a flat surface.This ensures a smooth finish for your cake.

Step 17

Divide the coffee custard into four equal parts and use it to evenly grease all cake layers.Use an offset spatula for an even spread.

Step 18

Stack the layers, cover the cake with plastic wrap, and refrigerate overnight or at least for 4 hours.Refrigeration helps the layers to set and meld with the custard.

Step 19

Remove the butter and the coffee custard (200 grams | 7.05 oz) from the fridge at the same time so they reach room temperature.

Step 20

Melt the chocolate in a double boiler and cool it to 77F (25C).

Step 21

Whip the butter with the powdered sugar until fluffy, then add the cooled melted chocolate and continue whipping.

Step 22

Fold in the coffee custard, mixing lightly but thoroughly.

Step 23

Remove the cake from the mold and acetate tape. Smooth the chocolate cream over the cake and refrigerate until set.Use a cake scraper for a smooth finish.

Step 24

Combine the cold cream and mascarpone in a mixing bowl. Whip with the powdered sugar and vanilla until the mixture is fluffy and thick.

Step 25

Transfer the mascarpone cream to a piping bag fitted with a 1cm (0.39 inch) round tip.

Step 26

Pipe the cream on top of the cake in your desired pattern.

Step 27

Sprinkle the cake with alkalized cocoa powder.For a cleaner look, use a fine sieve to sprinkle the cocoa. Enjoy!

Servings

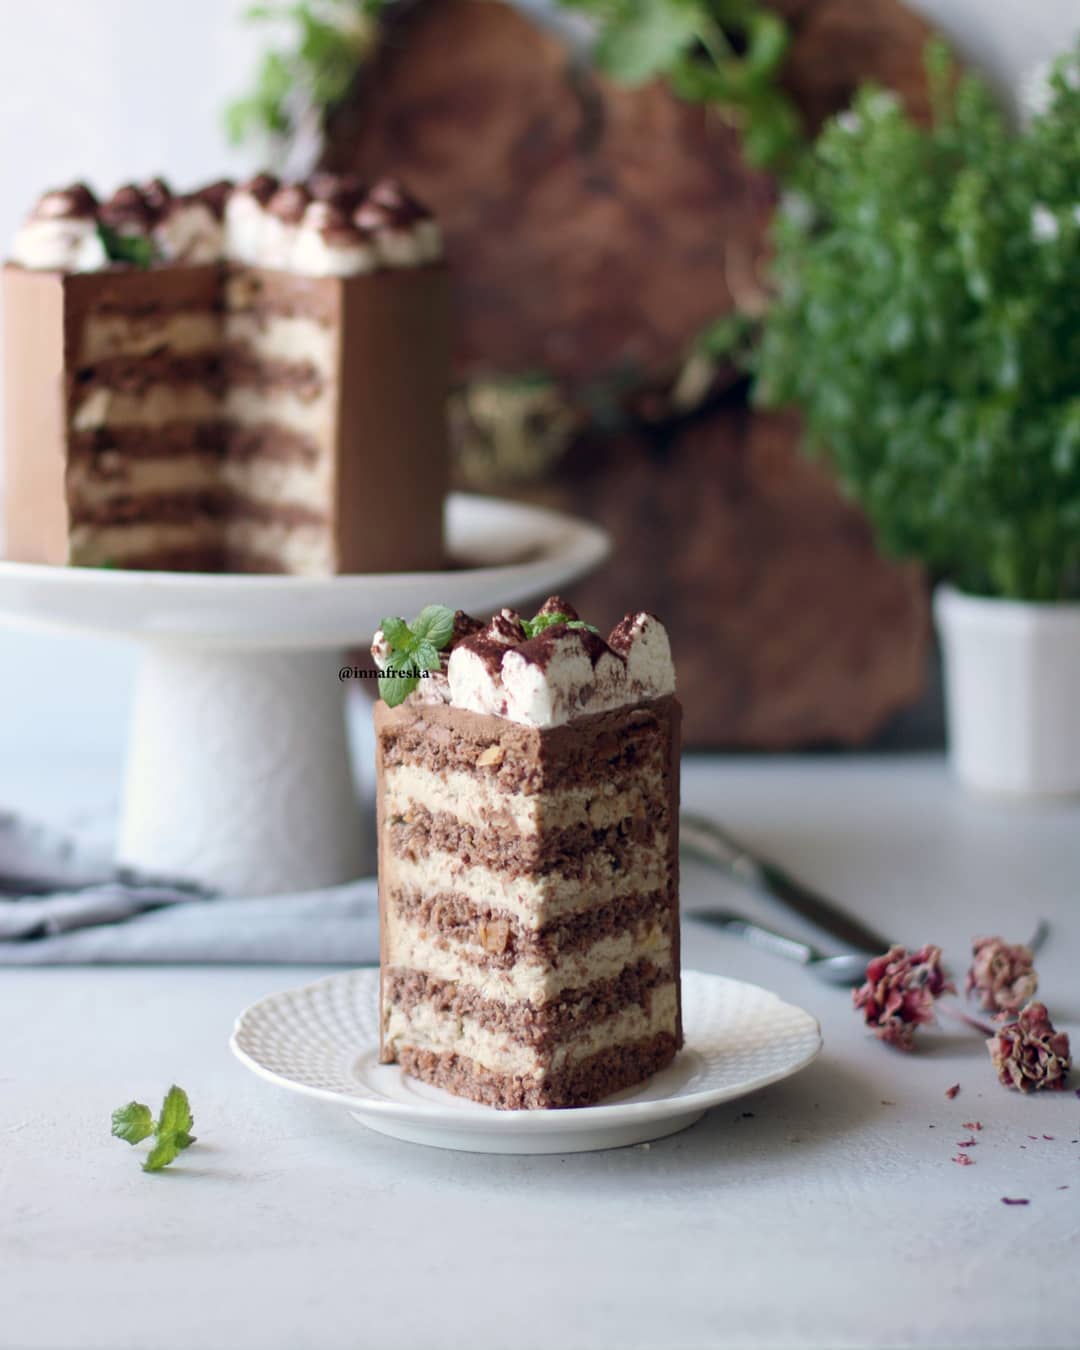
Imagine slicing into this elegant masterpiece at your next gathering. Paired with a freshly-brewed cup of espresso, the rich coffee undertones of the custard will perfectly complement the light almond biscuit layers. For a touch of sophistication, dust each slice lightly with unsweetened cocoa powder and add a few almond flakes as garnish. Serving alongside a dollop of whipped cream or a scoop of vanilla ice cream will elevate each bite. If you’re feeling festive, a drizzle of caramel sauce or chocolate ganache makes this dessert even more indulgent. Whether it’s a casual tea with friends or a luxurious dinner party, this versatile cake promises to delight.

Variations

For a gluten-free version, substitute the cornstarch with an equivalent amount of gluten-free all-purpose flour. Ensure that all other ingredients, especially the almond crumbs, are certified gluten-free. For a vegan variation, swap the egg whites with aquafaba, egg yolks with mashed tofu, and butter with plant-based margarine. Use almond or another non-dairy milk for the coffee custard, and choose vegan dark chocolate for the chocolate cream. The result will be just as delightful and suitable for vegan friends and family.

Faq

  • Can I make the cake layers in advance?

    Yes, you can prepare them up to two days ahead. Just store them in an airtight container to keep them fresh.

  • What if I don’t have an acetate cake collar?

    You can use parchment paper strips as an alternative. They might not give as smooth a finish but will still keep the layers in place.

  • How do I know if my egg whites are whipped to the right consistency?

    Your egg whites should form stiff peaks that hold their shape without collapsing. It should look glossy and smooth.

  • What should I do if my custard is too thick?

    If your custard turns out too thick, add a splash of warm milk gradually until you reach the desired consistency.

  • How can I achieve a smooth finish with the chocolate cream?

    Whip your butter and powdered sugar well before adding the chocolate. Also, ensure your chocolate is cooled to the right temperature before mixing.

  • Can I use flavored mascarpone?

    Absolutely! Try coffee-flavored mascarpone for an extra coffee kick or even vanilla for a sweeter touch.

Nutrition facts

Walnut, coffee & vanilla cake with bitter chocolate
Recipe Yield:1 cake
Calories:Estimated total calories for the entire cake
Calories (Min - Max):5500 - 6000
Total Fat:350
Saturated Fat:210
Protein:115
Total Carbohydrate:490
Total Sugars:400