Ingredients

Biscuit

5 eggs
150 grams (5.30 ounces) sugar
180 grams (6.35 ounces) flour
35 grams (1.25 ounces) butter
10 grams (0.35 ounces) vanilla sugar
8 grams (0.30 ounces) baking powder
We recommend:

Condensed chocolate cream

150 grams (5.30 ounces) sugar
200 milliliters (7.05 fluid ounces) cream (33%)
1 teaspoon honey
50 grams (1.75 ounces) butter
80 grams (2.80 ounces) milk chocolate
1 teaspoon cocoa
80 grams (2.80 ounces) white chocolate
We recommend:

Instructions

Step 1

1. Preheat your oven to 180°C (356°F).

Step 2

2. For the biscuit, whip 5 eggs with 150 grams (5.30 ounces) of sugar and 10 grams (0.35 ounces) of vanilla sugar until fluffy and firm. Ensure the mixture is light and airy to achieve a spongy texture.

Step 3

3. Sift 180 grams (6.35 ounces) of flour and 8 grams (0.30 ounces) of baking powder together.

Step 4

4. Melt 35 grams (1.25 ounces) of butter.

Step 5

5. Gently fold the sifted dry ingredients into the egg mixture in three additions, being careful not to deflate the batter. Use a spatula and gentle folding motions to incorporate the dry ingredients.

Step 6

6. Mix 3 tablespoons of the batter with the melted butter in a separate bowl, then fold it back into the main batter. This method helps to evenly distribute the butter without deflating the batter.

Step 7

7. Pour the batter into a prepared 18 cm (7-inch) cake pan and bake for 30 minutes. Adjust baking time as necessary; bake until a toothpick inserted into the center comes out clean. Don’t open the oven door during the first 20 minutes to prevent the biscuit from collapsing.

Step 8

8. For the condensed chocolate cream, place 150 grams (5.30 ounces) of sugar, 200 milliliters (7.05 fluid ounces) of cream (33%), 1 teaspoon of honey, and 50 grams (1.75 ounces) of butter in a saucepan. Simmer over low heat for 10 minutes.

Step 9

9. Remove from heat and divide the mixture into two parts. Add 80 grams (2.80 ounces) of white chocolate to one part, and add 80 grams (2.80 ounces) of milk chocolate and 1 teaspoon of cocoa to the other. Mix each well. Ensure both mixtures are smooth and chocolate is fully melted.

Step 10

10. Allow the creams to cool before covering with cling film and refrigerate overnight to set. This ensures the creams have a firm texture for assembly.

Step 11

11. For Creme #1, make sure all ingredients are at room temperature. Whisk 100 grams (3.55 ounces) of cream cheese with 150 grams (5.30 ounces) of condensed cream with white chocolate until combined. Add 300 grams (10.60 ounces) of mascarpone and stir until smooth. Avoid overmixing to prevent the mascarpone from becoming grainy.

Step 12

12. For Creme #2, follow the same process as Creme #1. Whisk 100 grams (3.55 ounces) of cream cheese with 150 grams (5.30 ounces) of condensed cream with milk chocolate until combined, then add 200 grams (7.05 ounces) of mascarpone and stir until smooth.

Step 13

13. For the soaking mixture, combine 90 milliliters (3 fluid ounces) of freshly brewed coffee, 1 tablespoon of condensed milk, and 30 milliliters (1 fluid ounce) of cream liqueur. Allow to cool. Opt for strong coffee to enhance the cake’s flavor.

Step 14

14. To assemble, cut the biscuit into three even layers. Generously soak each layer with the coffee mixture.

Step 15

15. Place both creams in separate piping bags. Starting with the first layer of sponge, alternate piping circles of Creme #1 and Creme #2 from the outer edge to the center. Create a uniform pattern for the best visual appeal when slicing the cake.

Step 16

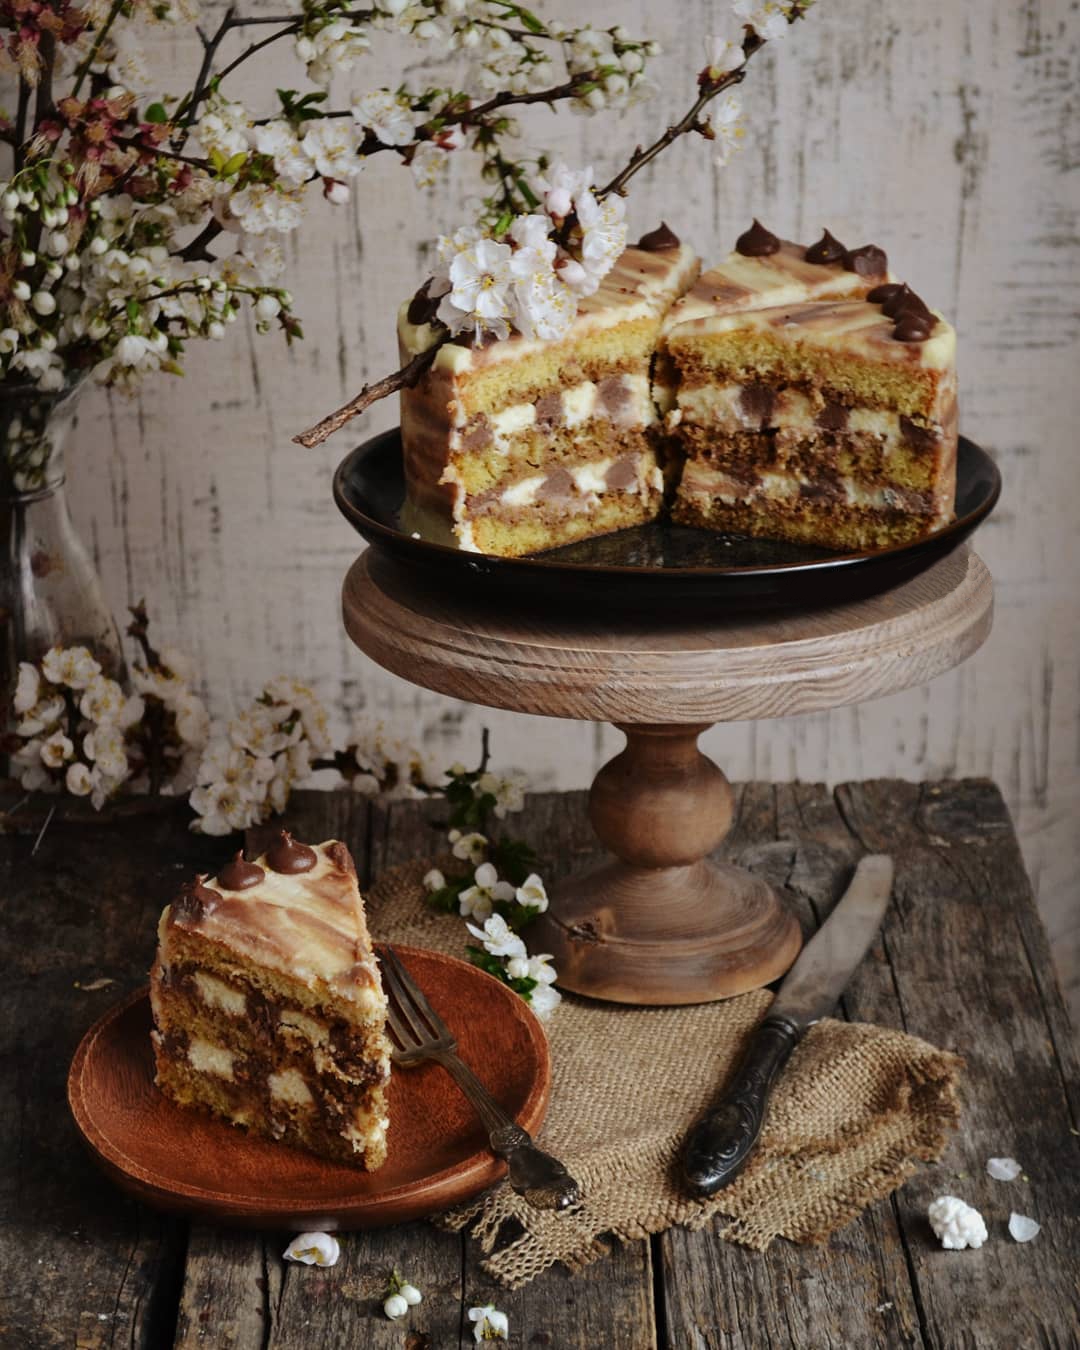
16. Repeat the process for the second layer, alternating the order of the creams to achieve a checkerboard effect when sliced. Top with the third layer, soaked side down.

Step 17

17. Cover the entire cake with the remaining white cream and use the brown cream to create a decorative or marble pattern on top.

Step 18

18. Refrigerate the cake before serving to allow the flavors to meld together. Ideally, let the cake sit for at least 2 hours in the fridge.

Servings

Picture yourself in a cozy café, indulging in a slice of this BARISTA cake, paired perfectly with a warm cappuccino or a glass of espresso martini for a more spirited touch. The cake's rich, moist layers, infused with coffee and cream liquor, marry harmoniously with its alternating chocolate crèmes, creating a delightful checkerboard pattern that’s a feast for both the eyes and the taste buds. For an extra touch of elegance, lightly dust some cocoa powder on the top layer or scatter a few chocolate curls as a garnish. If you’re serving this cake at a gathering, consider pairing it with a variety of coffee-based beverages, from classic lattes to affogatos, ensuring that each bite is complemented by a perfect sip. For a summer twist, you can even try serving a slice of BARISTA cake with a scoop of vanilla or coffee-flavored ice cream. The cold cream contrasts beautifully with the cake's tender texture, creating a refreshing and luxurious treat that’s perfect for warm afternoons.

Equipment

Variations

For a gluten-free version of the BARISTA cake, substitute the regular flour in the biscuit with a gluten-free all-purpose flour blend. Make sure to sift the flour well to avoid any lumps and ensure even mixing. To make a vegan variation, swap the eggs in the biscuit with a commercial egg replacer or use a mixture of flax seeds and water (1 tablespoon of ground flaxseeds mixed with 2.5 tablespoons of water for each egg). Use plant-based butter and whipped coconut cream for the crèmes, and replace the mascarpone and cream cheese with vegan alternatives available in stores. Ensure the chocolate you use is also vegan-friendly.

Faq

  • How do I avoid overmixing the biscuit dough?

    Fold the dry ingredients in gradually, using a spatula, and mix just until combined to keep the batter light and airy.

  • Can I use regular milk instead of cream for the condensed chocolate cream?

    Using regular milk would affect the richness and consistency of your cream. Stick with the 33% cream for the best results.

  • What’s the best way to store the cake?

    Keep the cake refrigerated, covered with a cling film or in an airtight container, and consume within 3 days for optimal freshness.

  • Can I make the soaked layers ahead of time?

    Yes, you can prepare and soak the biscuit layers up to a day in advance and store them in the fridge until you are ready to assemble the cake.

  • How can I tell if my crèmes are perfectly whipped?

    The crèmes should be smooth and not overly stiff. Over-whipping can cause the mascarpone to break down, so stop whisking as soon as the mixture is homogenous.

  • What’s the best way to achieve a marble pattern with the crèmes?

    Use a toothpick or a skewer to create delicate swirl patterns by dragging it through the different crèmes before they set.

Nutrition facts

BARISTA CAKE
Recipe Yield:1 cake (18cm/7-inch)
Calories:Calories per serving (1 slice): 400 - 500
Calories (Min - Max):400 - 500
Total Fat:35g
Saturated Fat:20g
Protein:7g
Total Carbohydrate:40g
Total Sugars:30g