Ingredients

Cake layers

  • 600 grams (21.16 ounces) flour
  • 50 grams (1.76 ounces) cocoa powder
  • 375 grams (13.23 ounces) butter
  • 15 milliliters (1 tablespoon) vinegar (9%)
  • 0.25 teaspoon salt
  • 1.5 eggs (use 2 large eggs, lightly beaten and use 1.5 of the mixture)
  • 225 milliliters (7.6 fluid ounces) cold water

The cream

  • 360 grams (12.7 ounces) butter
  • 360 grams (12.7 ounces) condensed milk
  • 2 large eggs
  • 600 milliliters (20.29 fluid ounces) milk
  • 90 grams (3.17 ounces) sugar
  • 3 tablespoons (24 grams) flour

Equipment

  • Mixer

    A stand mixer works best for incorporating ingredients smoothly, but a hand mixer can do the job too. If you prefer a more hands-on approach, mixing by hand is always an option.

  • Mixing Bowls

    Useful for combining various components of the recipe. It’s always helpful to have a few different sizes on hand.

  • Rolling Pin

    Essential for flattening your dough evenly. If you don't have one, a wine bottle can work in a pinch.

  • Parchment Paper

    Helps in rolling out the dough without sticking and makes transferring to the oven easy.

  • Fork

    For piercing the dough to prevent bubbles while baking.

  • Oven

    Ensure your oven is preheated to the right temperature for consistent baking.

  • Acetate or Cling Film

    To line the sides of your cake ring for a neat assembling process.

  • Cake Ring

    Keeps the cake layers and filling neatly stacked as they chill. A springform pan without the base works too.

Instructions

Step 1

Preheat your oven to 200°C (392°F).

Step 2

In a mixer bowl, combine flour and cocoa powder. Add the softened butter cut into cubes and mix until the mixture resembles fine crumbs.

Step 3

If you don't have a mixer, you can use your hands to combine the ingredients until you achieve the same texture.

Step 4

In another bowl, combine cold water, lightly beaten eggs, vinegar, and salt.

Step 5

Turn the mixer on low speed and gradually add the liquid mixture to the chocolate crumbs. Mix until a soft, slightly sticky dough forms.

Step 6

Transfer the dough to a plate sprinkled with flour, cover with plastic wrap, and refrigerate for 1-2 hours until it becomes firm and cool.

Step 7

This resting period helps the dough become easier to handle and roll out.

Step 8

Roll out the dough on floured parchment paper, or between two sheets of parchment paper. Carefully remove the top sheet of parchment and cut out a circle of the desired diameter. Do not remove the edges; bake them along with the circle as they will be used for crumbs later. Pierce the crust with a fork.

Step 9

Allow the rolled-out dough to rest for a couple of minutes before baking. This helps prevent the dough from shrinking in the oven.

Step 10

Bake the cake layers for 10 minutes until set.

Step 11

Keep an eye on the layers as they bake quickly. They should be firm but not overly browned.

Step 12

To prepare the cream, bring the milk and sugar to a boil in a saucepan.

Step 13

In a separate bowl, mix eggs and flour together.

Step 14

Slowly pour a small amount of hot milk into the egg mixture while whisking to temper the eggs, then pour this mixture back into the remaining hot milk in the saucepan, stirring constantly.

Step 15

Bring the mixture to a boil again while stirring until it thickens. Cool to room temperature.

Step 16

Make sure to stir continuously to avoid lumps. Cooling to room temperature ensures that the custard does not melt the butter.

Step 17

Whip the softened butter with the condensed milk until light and fluffy, then gradually add the cooled custard, whipping continuously until fully combined.

Step 18

To assemble the cake, place a cake ring on your serving plate and line the sides with acetate or cling film.

Step 19

Layer the cake and cream alternately inside the ring.

Step 20

Refrigerate the assembled cake overnight to allow the flavors to meld and the cake to set.

Step 21

Before serving, remove the ring and film. Crush the baked cake scraps into crumbs and sprinkle them over the top and sides of the cake for decoration.

Servings

When it comes to serving this delectable chocolate cake, the possibilities are endless. Picture this: a slice of moist, rich cake with a dollop of freshly whipped cream, so light it melts in your mouth. For an elevated touch, add a drizzle of warm chocolate ganache or caramel sauce over the top. Hosting a gathering? Transform your cake into a show-stopping center piece by garnishing with fresh berries, edible flowers, or a sprinkle of powdered sugar. Your guests will not only be impressed by the cake’s taste but also its stunning appearance. And why not experiment with texture? Serve alongside a crunchy element like a biscotti or some candied nuts to complement the silkiness of the cream. Finally, for those who adore contrasting flavors, a scoop of tangy sorbet or a strong espresso can perfectly balance the cake’s sweetness.

Variations

For those looking to make a gluten-free version of this cake, simply substitute the flour with a gluten-free flour blend. Ensure it has xanthan gum or add a small amount yourself to achieve the right texture. Going vegan is just as easy with a few switches: Use a plant-based butter substitute, and replace the eggs with a mix of flaxseed meal and water or a commercial egg replacer. Opt for a vegan condensed milk, and ensure your cocoa powder and flour are vegan-friendly. The result? An equally delicious treat that fits your dietary needs!

Faq

  • Can I use whole wheat flour instead of all-purpose flour?

    You can, but it will yield a denser cake. Whole wheat flour absorbs more liquid and alters the texture.

  • How do I store the cake if it’s not all eaten immediately?

    Store the cake in an airtight container in the refrigerator. It will stay fresh for up to 4 days.

  • Can I use margarine instead of butter?

    Yes, you can substitute margarine for butter in this recipe. However, it may slightly alter the taste and texture of the cake.

  • What’s the best way to apply the cream between the layers?

    Use an offset spatula for even application, and ensure each layer is level before adding the next. This will help keep the cake stable.

  • How do I make sure the cake layers are even?

    Roll the dough out to a uniform thickness and use a template or cake ring to cut out perfect circles. Weighing out equal portions of dough can also help.

  • Is it necessary to chill the cake overnight before serving?

    Chilling helps the flavors meld together and results in cleaner slices, but if you’re short on time, a few hours in the fridge can suffice.

Nutrition facts

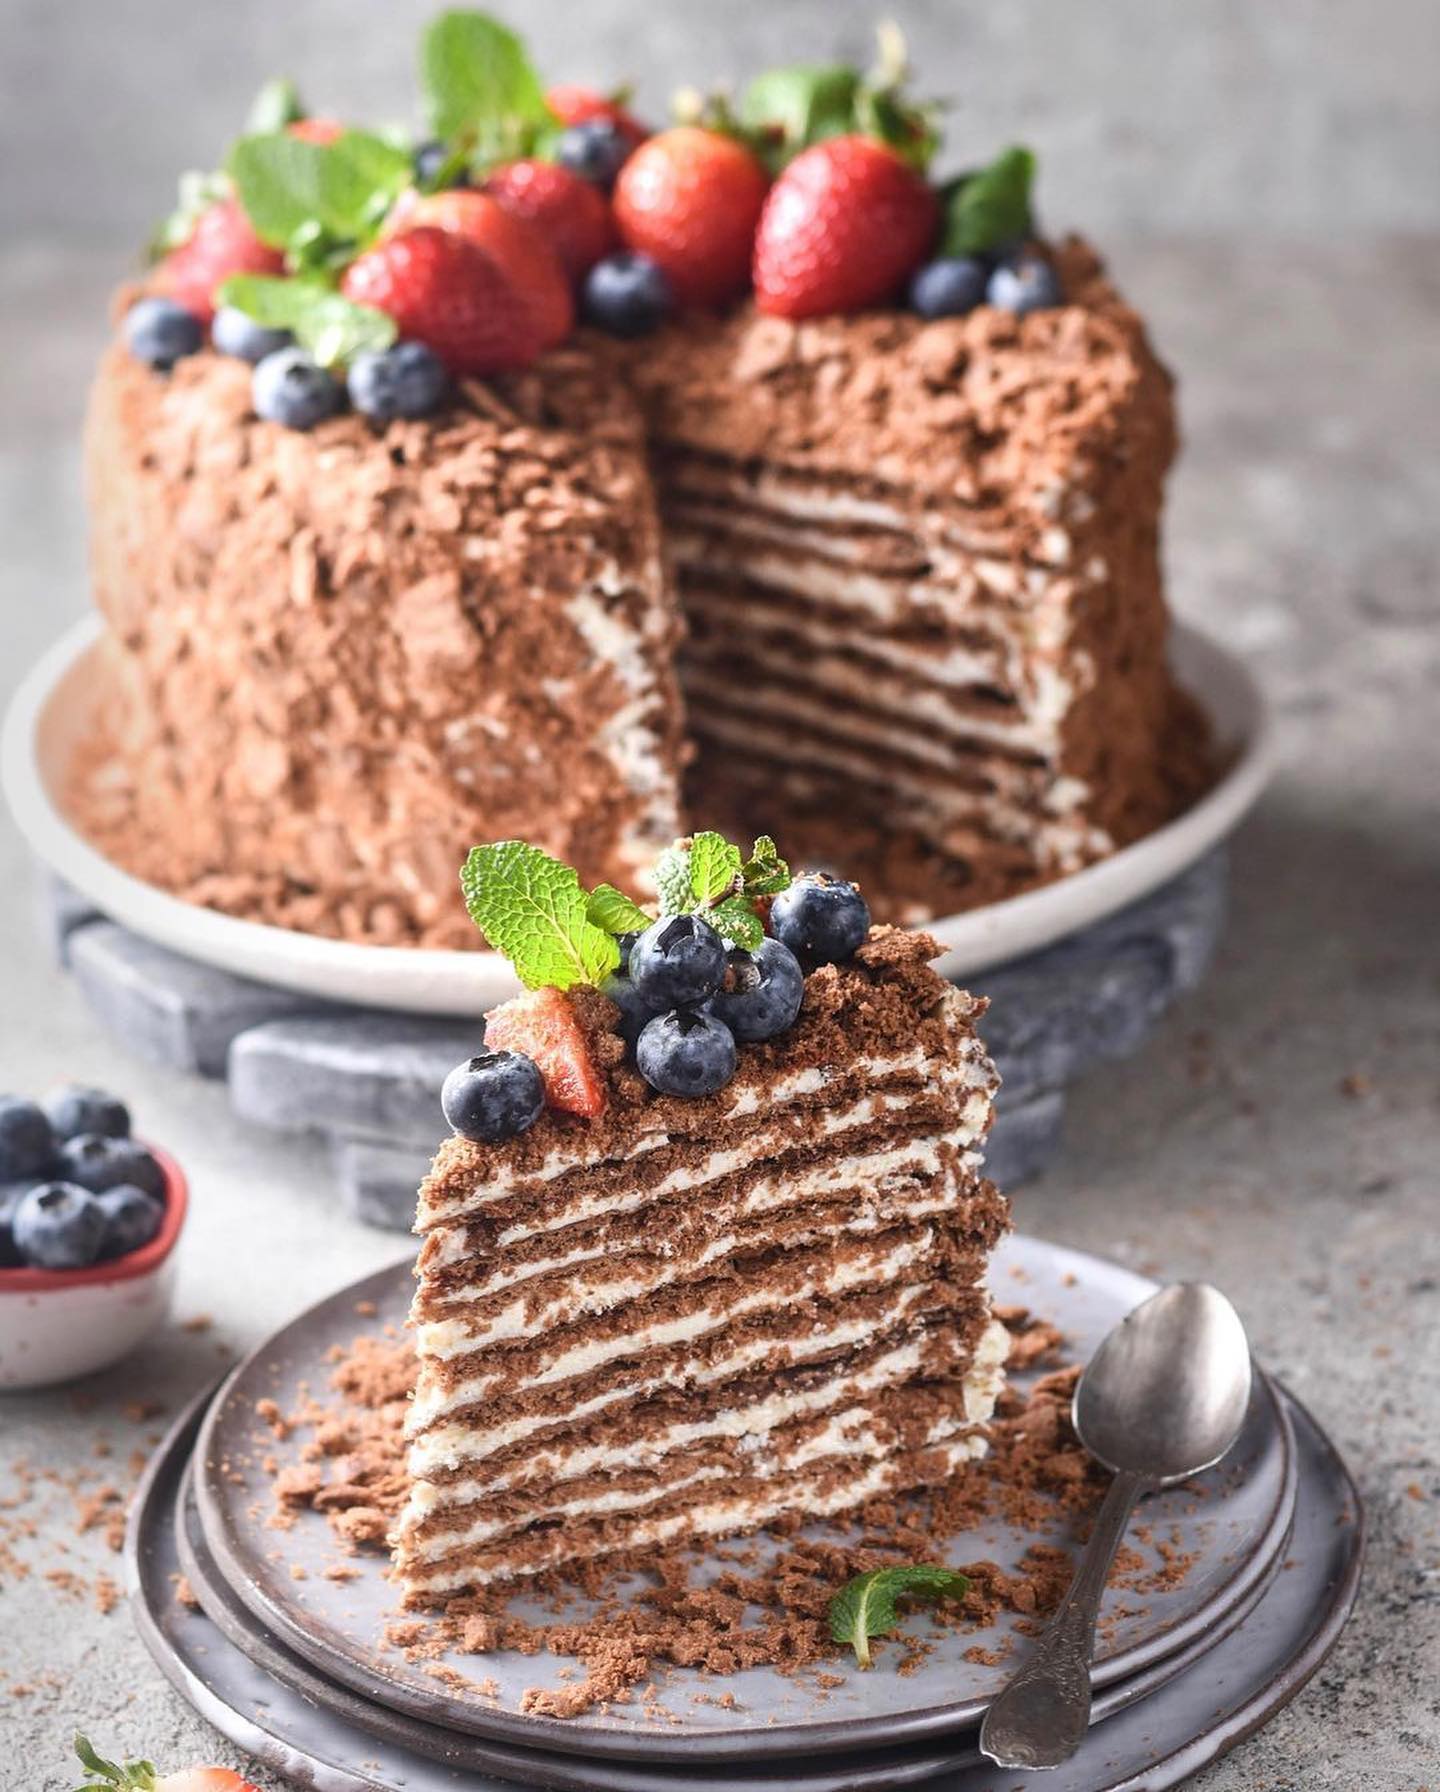
Crispy chocolate Napoleon cake
Recipe Yield:1 cake – 22cm (8.66 inch)
Calories:Each slice (1/12th of the cake) contains approximately 600-625 calories.
Calories (Min - Max):7000 - 7500
Total Fat:450g
Saturated Fat:270g
Protein:75g
Total Carbohydrate:650g
Total Sugars:450g