Ingredients
Chocolate Sponge Biscuit
Orange Custard
Chocolate Crème
Instructions
Step 1
Step 2
Step 3
Step 4
Step 5
Step 6
Step 7
Step 8
Step 9
Step 10
Step 11
Step 12
Step 13
Step 14
Step 15
Step 16
Step 17
Step 18
Step 19
Step 20
Step 21
Step 22
Step 23
Step 24
Step 25
Step 26
Step 27
Step 28
Servings
🎉 **Serving Suggestions & Ideas** 🎉
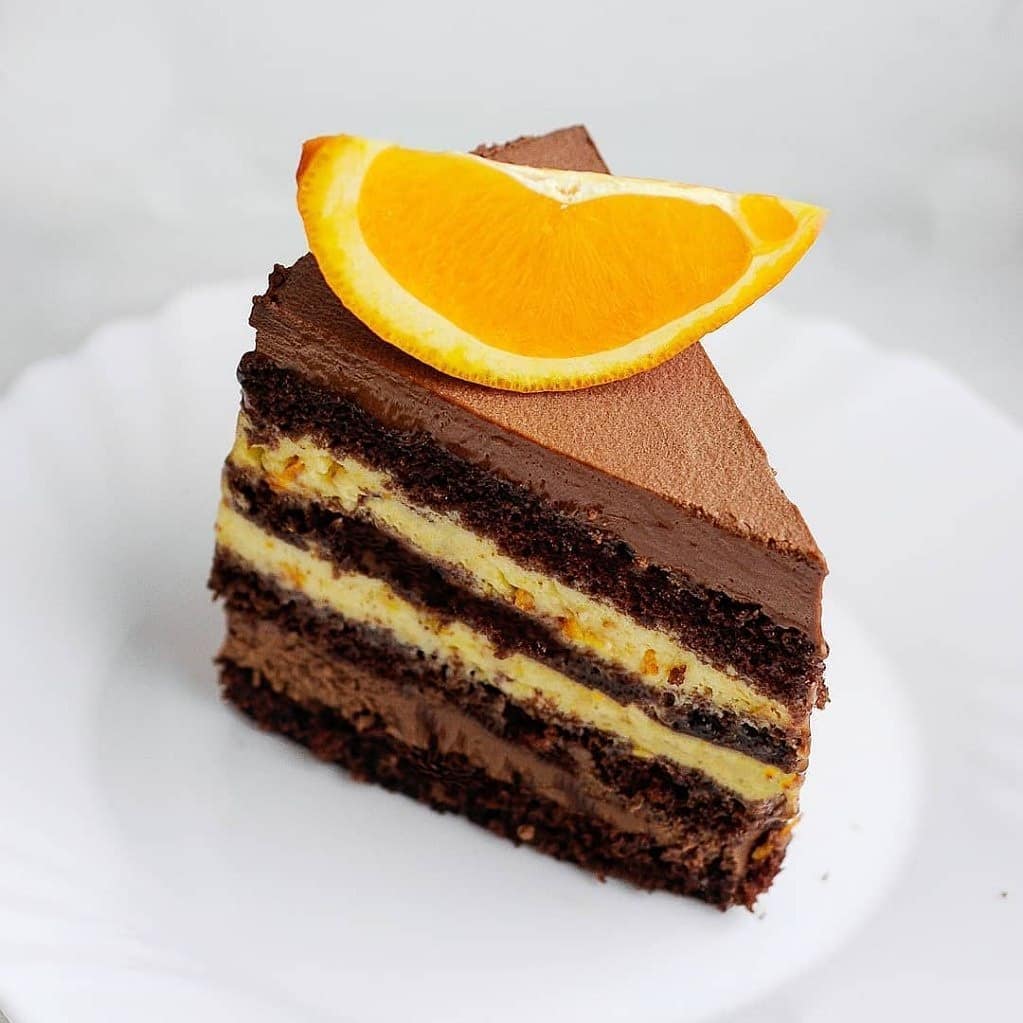
This chocolate cake with orange custard is versatile and can be enjoyed in a multitude of ways. For a **classic presentation**, simply dust the top with a light layer of **powdered sugar** and garnish with **orange zest curls** for a touch of elegance.
If you’re in the mood for something more **decadent**, drizzle the cake with a **rich chocolate ganache** and scatter some **chocolate shavings** on top. 🍫 For a burst of freshness, pair each slice with a scoop of **vanilla ice cream** or a dollop of **whipped cream** – the contrast of cold creaminess against the moist cake is heavenly! 🍨
Hosting a brunch or tea party? Slice the cake into smaller, bite-sized pieces and serve with a **selection of teas** or **freshly brewed coffee**. The orange custard brings out a refreshing citrus note that beautifully complements hot beverages. 🫖☕️
Equipment
Perfect for baking smaller cakes. Make sure to grease it well to avoid sticking.
Essential for whipping ingredients into a dense foam; a handheld mixer works too but may take a bit more effort.
You'll need at least two – one for the chocolate mixture and one for the eggs and sugar.
For carefully folding in ingredients without deflating the batter.
Great for gentle mixing and scraping down the sides of bowls.
To cool the sponge biscuit evenly after baking, ensuring it retains its texture.
Essential for setting the layers of the cake, especially the custard.
Helps in shaping and assembling the cake neatly. If you don’t have one, you can use the cake mold itself with cling wrap.
Variations
🌿 **Gluten-Free & Vegan Variations** 🌿
Good news for everyone! This cake can be easily adapted to suit gluten-free and vegan diets without compromising on taste. 🤗
💡 **Gluten-Free Variation:** Substitute the flour with a good quality **gluten-free all-purpose flour** blend. Make sure it contains xanthan gum or add a teaspoon to ensure the cake maintains its structure. 🍰
💡 **Vegan Variation:** Replace the eggs with **flaxseed eggs** (1 egg = 1 tablespoon of ground flaxseed + 3 tablespoons of water, let it sit for a few minutes to thicken). Use **plant-based butter** and **coconut cream** as alternatives for butter and cream. Swap the gelatin for **agar powder**, a plant-based gelling agent. 🌱
These simple swaps make it possible for everyone to enjoy this delightful cake without any dietary worries! 🙌
Faq
- Why did my sponge biscuit turn out dense?
This could be due to overmixing the batter or not incorporating enough air when whipping the eggs and sugar. Make sure to whip the eggs until they form a dense foam and fold the dry ingredients gently.
- Can I use regular cream instead of 33% cream?
Using cream with lower fat content may affect the texture and richness of the custard. For best results, stick to 33% cream, which provides the right consistency and flavor.
- Should I wait for the custard to cool completely before assembling?
Yes, allowing the custard to cool to room temperature before mixing with whipped cream helps prevent it from becoming too runny.
- What’s the best way to store the cake?
Keep the assembled cake in the refrigerator for at least 3 to 4 hours to let the flavors meld and the layers set. Cover it with cling wrap or store in an airtight container to prevent it from drying out.
- Can I prepare the cake layers in advance?
Absolutely! You can bake the sponge biscuit and prepare the custard a day ahead. Store them separately in the refrigerator and assemble the cake when ready to serve.
- How can I add more orange flavor?
You can enhance the orange flavor by incorporating a few drops of **orange extract** into the custard or sprinkling some additional orange zest between the layers during assembly.
