Ingredients
Sponge Biscuit
Filling
Instructions
Step 1
Step 2
- Combine flour, starch, and baking powder in a bowl. Make sure to mix them thoroughly to avoid lumps.
- Melt the butter and let it cool. Cool butter helps it to integrate better with the eggs and sugar mixture.
- Using a mixer, whip the eggs with sugar until fluffy. Gradually pour in the melted butter while continuing to whip. Take your time to whip this mixture properly; it's the key to a light sponge.
- Gradually pour the dry ingredients into the mixture, and stir until combined. Use a spatula or a mixer on low speed to avoid overmixing.
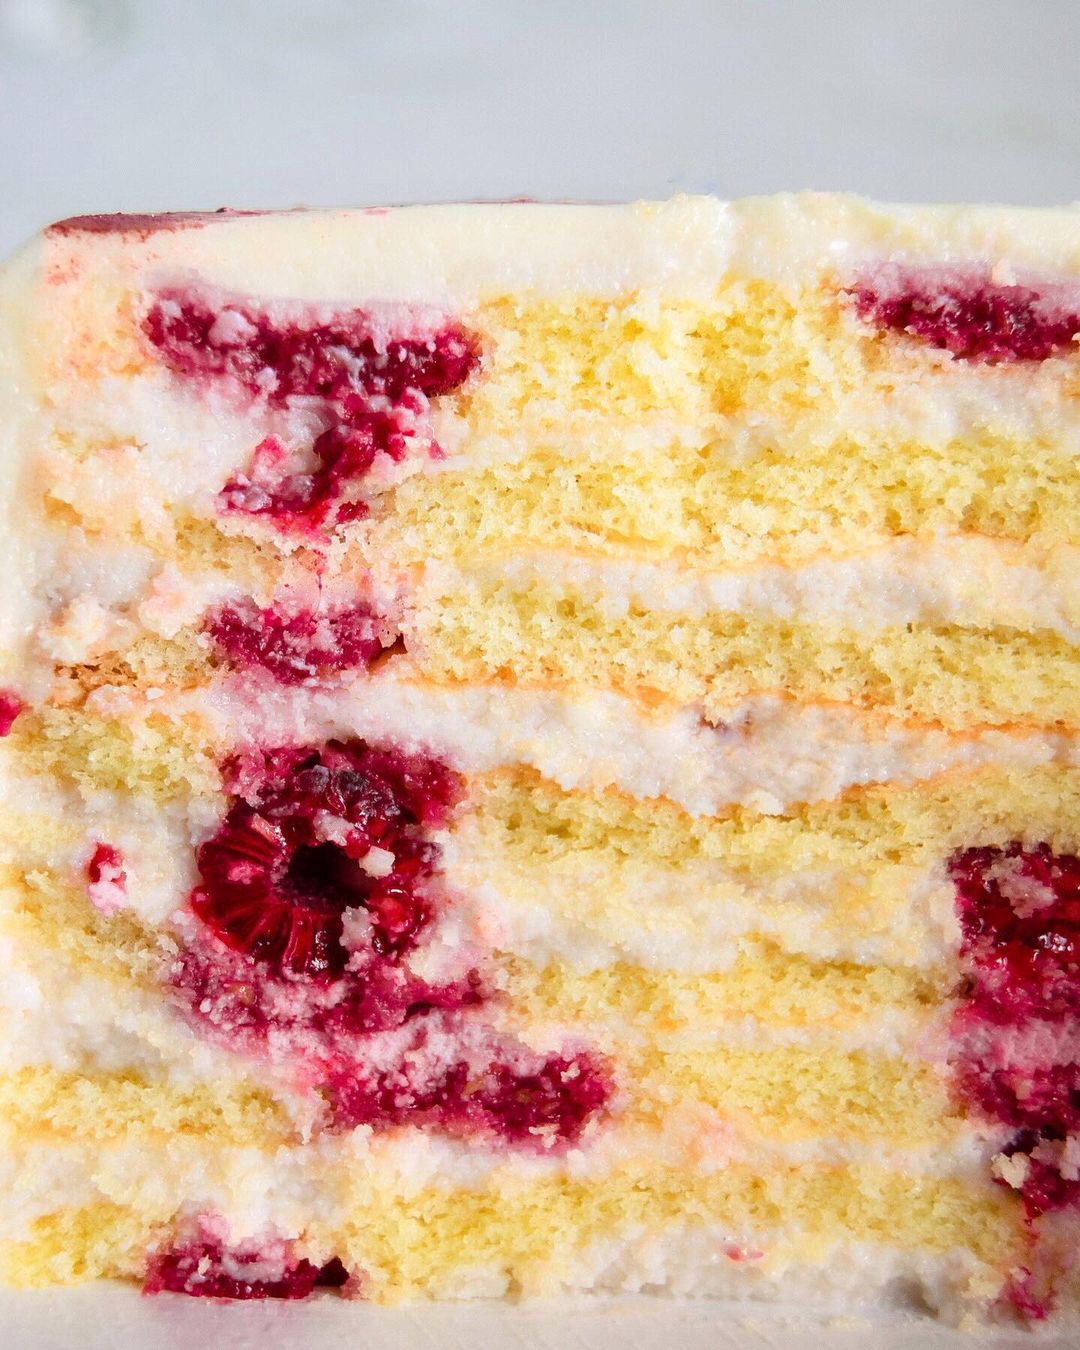
- Line the baking tray with baking paper, and place a ring on it. Pour a thin layer of dough into the ring, and add the raspberries. Then, remove the ring. Ensure the layers are even for consistent baking.
- Bake the cake layers in the oven preheated to 180°C (356°F) for 5 to 7 minutes. Keep an eye on them; they should be just lightly golden.
- Carefully remove the cake layers from the baking paper. They are extremely delicate, so handle with care and trim the edges if needed. Cooling them slightly before handling might help.
Step 3
Step 4
- Whip the mascarpone on low mixer speed, slowly pouring in the condensed milk. Ensure the mixer is set to low to prevent over-whipping.
- Add the raspberry syrup and whip a little more just until combined.
Step 5
Step 6
- Smear some filling onto the cake board and place the first cake layer on it. This helps the cake stay in place during assembly.
- Spread the filling over the sponge and lay out the raspberries. Layer with care for an even bite in every slice.
- Repeat with remaining layers.
- Cover the assembled cake with foil or plastic wrap and leave it in the fridge overnight with some weight on top. This helps the flavors meld and the cake to settle.
- Bon Appetit!
Servings
Equipment
Ensure it's adjustable or use a fixed one that fits your baking sheet perfectly for consistent cake layers.
A standard baking tray lined with parchment paper will help you easily remove your delicate cake layers.
Using a mixer will ensure you get the right fluffiness for both the sponge and the filling. A handheld mixer works fine, but a stand mixer can make the job easier.
Helps to prevent sticking and makes it easier to transfer cake layers without breaking them.
Variations
Faq
- How do I prevent my cake layers from sticking to the parchment paper?
Ensure your parchment paper is well-greased and consider lightly dusting it with flour before pouring in the batter.
- Can I use frozen raspberries instead of fresh ones?
Yes, but make sure to thaw and drain them well to avoid excess moisture in your cake.
- What is the best way to achieve a light and fluffy sponge?
Whip your eggs and sugar until the mixture is pale and voluminous, and carefully fold in the dry ingredients to retain airiness.
- Can I add other fruits to this recipe?
Absolutely! Blueberries, strawberries, or even a combination would work wonderfully. Just keep the fruit pieces small.
- How do I ensure my cake doesn't collapse overnight?
Place some gentle weight (such as a small plate) on the cake while it sets in the fridge to keep it compact and stable.
- Can I make the cake layers in advance and store them?
Yes, you can freeze the cake layers, just wrap them tightly in plastic wrap and store in an airtight container for up to a month.

