Ingredients
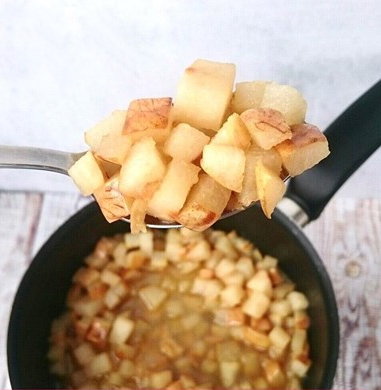
Pear Filling
Instructions
Step 1
Step 2
Step 3
Step 4
Step 5
Step 6
Step 7
Step 8
Step 9
Step 10
Step 11
Step 12
Step 13
Servings
- Classic Pie:
Serve this filling in a flaky pie crust topped with a scoop of vanilla ice cream. The warmth of the filling paired with the cold ice cream is *divine*! 🍰
- Tart Delight:
Use the pear filling in a buttery tart shell, garnished with some fresh mint leaves and a drizzle of caramel sauce. Your guests will be begging for seconds! 🥧
- Gourmet Over Pancakes:
Spoon the pear filling over a stack of fluffy pancakes for a decadent brunch. Add some whipped cream and a dusting of powdered sugar for extra flair. 😋
Equipment
This is essential for cooking the pears evenly. Make sure it’s deep enough to avoid any overflowing juices.
Accurate measurements are key to achieving the perfect balance of flavors. Invest in a good set to ensure your recipes come out flawlessly each time.
A whisk helps in stirring the ingredients smoothly and ensuring the gelatin mixes thoroughly without lumps.
Use a mold that matches the specified diameter (16-18 cm) for a professional finish. Silicone molds are great for easy release.
Variations
- Gluten-Free:
Ensure that all your ingredients, including the powdered gelatin, are certified gluten-free. Switch up the pie crust to use a gluten-free crust mix or almond flour-based crust. Your tummy will thank you!
- Vegan:
Substitute the butter with a vegan alternative like coconut oil or vegan margarine. Replace the gelatin with agar-agar powder (follow the package instructions for use). Enjoy a plant-based version that’s every bit as delicious! 🌿
Faq
- How do I know if my gelatin is ready to use?
When the gelatin has completely absorbed the water, it will appear thick and gel-like. This means it’s ready to be mixed with your filling.
- Can I use canned pears instead of fresh pears?
Fresh pears are recommended for the best texture and flavor, but you can use canned pears in a pinch. Just be sure to drain and pat them dry before using.
- How can I prevent my pear filling from turning brown?
The lemon juice in the recipe helps to prevent browning, but make sure to cover the filling tightly if you plan to store it for later use.
- What’s the best way to dice pears evenly?
First, cut the pears into quarters, remove the core, then slice each quarter into even strips before dicing into uniform cubes. This method ensures even cooking.
- Can I double the recipe for a larger batch?
Absolutely! Just double all the ingredients and make sure your saucepan is large enough to accommodate the increased volume.
- What’s the optimum freezing time for the filling?
Freezing overnight is ideal, but a minimum of 6-8 hours should suffice if you’re pressed for time. Ensure the filling is solid before removing it from the mold.

